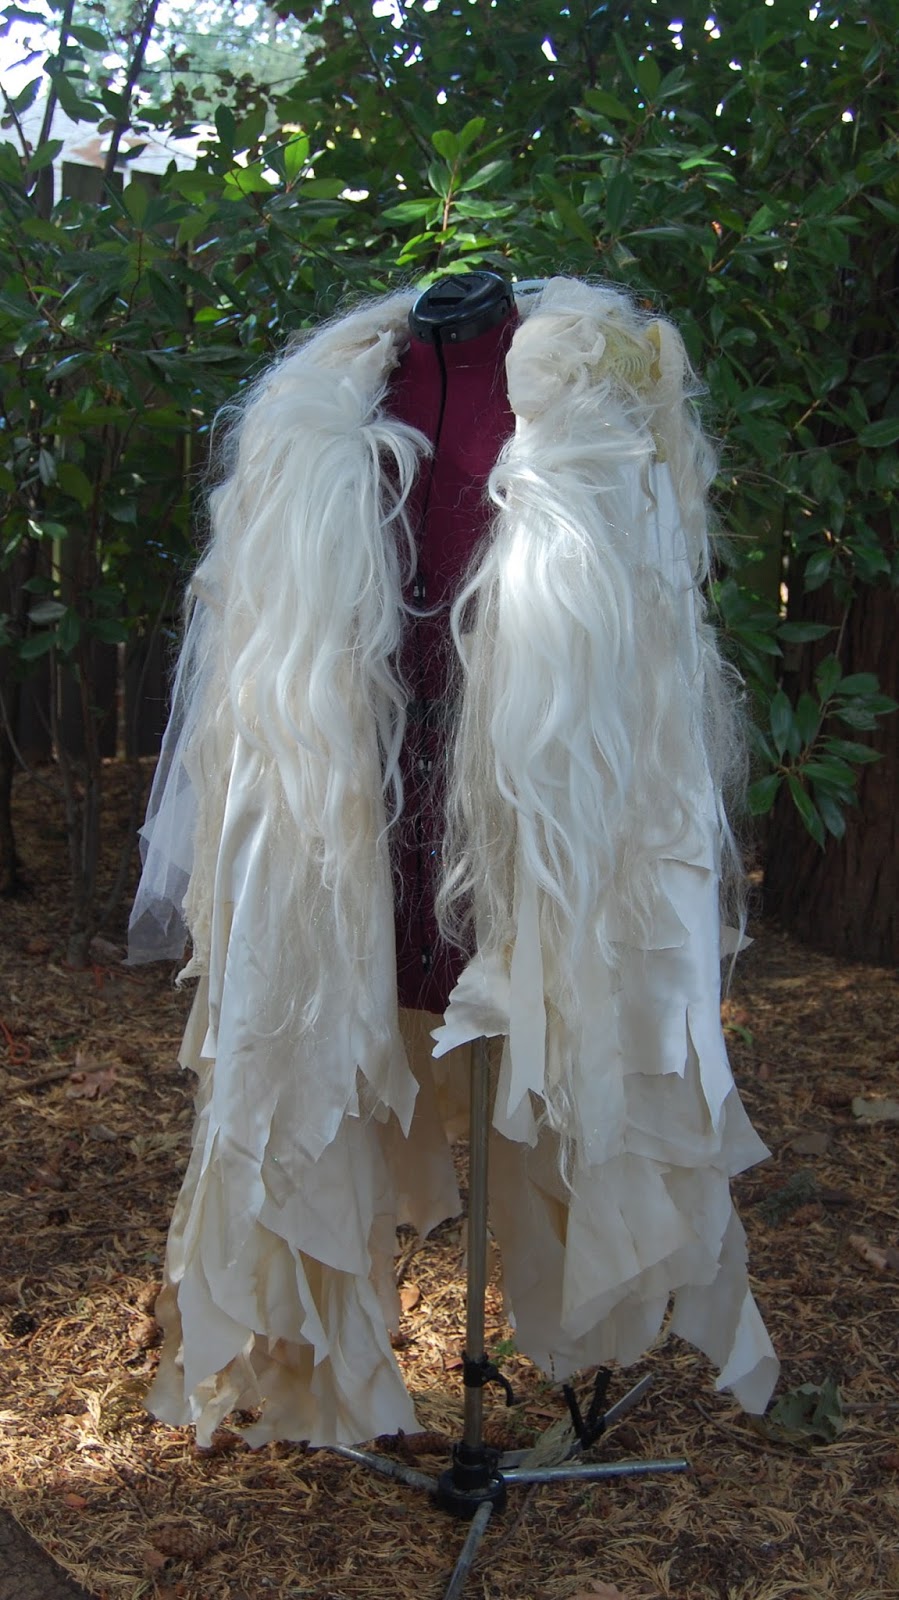
I am happy to announce that my Labyrinth inspired Ball Gown is officially finished!!!

It was of course totally worth it ;)

I included instructions on how to make your own below. I broke the construction down by costume piece, starting with the gown itself. In the mean time this beauty is going up on etsy as a ready to wear finished costume. It is a size Medium/ Large and includes the headpiece as well. Have a great day and thanks for stopping by.
Lindsay ;)


Materials: 15 yards of opal iridescent Organza fabric total, 3 yards of white lace fabric for the sleeve lining, lots and lots of white thread-start out with three large reels of thread, 1.5 white satin lining fabric, 6 or so long strands of amber beading, various colors of crenoline and sheer sparkle fabrics for accent on the bodice as well as tucked into the sleeves (I went with about 2-3 yards of fabric for both and about 4 or so yards total of green leaf trim, rick a rack, and additional trims), sewing pins, measuring tape, 1 yard of 1/4" white elastic, 4 yards of white satin lacing for lacing up the back, 4 yards of slim white satin lacing to lace up the sleeves. *Blue fabric pen-optional but I found it very helpful.
When I went about making this costume I decided to start with the undergarments first and then make the gown itself. I decided to start with a corset and had one I had already made. It was white with a lovely turquoise silk lacing up the back and it was perfect! So I donned my sewing doll and then made a hip bolster to fit. Then came the short lace ship, primarily to even out the gap between the hip bolsters in the back. Finally, a big poofy petticoat.

In the end I didn't end up using a pattern for the gown itself, daring or insane, I'm not sure which and most likely a bit of both, but I really just cut the bodice gown pieces so it was like one big heart shape (with the sides clipped vertically a little bit) for the front center and then a front side panels in line with the corset. I followed with back panels in the same manner. I cut each piece a bit larger and then I added patches of semi transparent fabrics, little bits of colored mesh, some zig zag stitches in different thread colors, some gold rick rack, etc. It looked a bit gaudy but you will be adding a layer of opal organza over this layer so it will only show through slightly and well, I thought it looked rather interesting so I went with it. In the end you will notice I added it both in between the satin base layer of the bodice and the outside of the bodice so it really gave the feeling of movement. For your own, do as you like ;)

In this photo you can see some of the shimmery and glittery fabrics I tucked into the sleeve poofs between the top organza sleeve and the lace lining.

This photo is with the top layer of the organza skirt pulled up. I just pinned it up but this is where you would want to add your cameo or small clock brooch to hold the top layer up.
We're going to work on that huge skirt next!

The skirt is tough but not impossible. Bring sewing pins and maybe a needle and thread to hold the pleats as you lay out the skirt. First, take one big piece of organza. I went with about 3 yards of fabric for the top panel and then a little less in width for the lower layer of organza. I placed these pieces so the top layer went all the way around and the lower layer of organza fell mostly in front but slightly off center so the top layer could be pulled up later with a brooch added.
Around the top sew the top and bottom layer together leaving about 1/4" raw hem. Fold this double piece in half. I marked the halfway mark with a blue fabric pen (optional but it kept me sane while working on this portion of the costume for sure). Then add a pleat to the center front with an overlap of about 1.5" on each side *3.5" downward from the top hem of the waistband first by pinning it and then either by tacking it down by hand or sewing this pleat on your sewing machine. Align the center V of the skirt pleat to the center V of your bodice. Next add a pleat to each side in front so that the 1.5" overlay pleat matches up with the side seams on the gown bodice that run up the dress vertically. You also want to make sure that the pleat also falls 1.5" below the top hem of the skirt.
By doing this you carefully create a very controlled pleated skirt that also fits well with the V of the bodice. By the time you have reached the side pleats you will be up at the top of the skirt hem and won't have to worry about a slope added at all. Pin, check and then sew the skirt to the bodice. In the very back of the dress you will want it to fall open, closed only by that lovely lacing you will later add. In the back you will have extra fabric so you will want to bring the vertical back seams together. *Assume the right side is going to meet and fall underneath the left slightly-an ever so slight overlay of the organza in back. Mark, trim and fold over and sew the edges vertically down both sides of the back of the skirt. For the top back center of the bodice you will want to fold in and sew down the lining of the bodice to the outside, again vertically about 3/4" inward on each side from the center back. I also added light green leaf trim to give it all a bit more creeping vine kind of feel. Assume where your lacing holes should be, reinforce the holes either by hand or on a small button hole setting.

Once you have gotten this far you will want to add your beaded trim around the waist of the gown. Carefully either hand sew the beads on (I did it and it was very time consuming) or purchase a trim-I would recommend something maybe 1/4" to 1/3" width. You will want enough to go all the way around the shoulders and waistline so measure correctly before buying your beading. As the beading goes around the top of the gown-shoulders included-I added the beading to the top of the bodice after the sleeves were added.
Once all of this was done I still needed sleeves. I had added elastic shoulder straps to the gown bodice earlier and this was really going to come in handy when I went to add those sleeves. For this you can purchase a poofed sleeve pattern and make yours a lot larger than the original pattern you select. I used a set of big sleeves I have from another item and simply enhanced them. For this assume 3.5 yards of fabric for the organza outer sleeves, slimmer of the white lace lining and then about 2-3 yards of extra shimmer mesh and such to stuff them.

You are going to want the sleeves taper as they lower toward the wrists. I made my sleeves really long, and really wide, and I added detailed embellishment of the iridescent fabrics to the lower sleeves and I also added green leaf trim running up the inside of the sleeves as well. When cutting your fabrics you are going to want the lower, tapered area of your sleeves wide enough to slip your wrists through and then add little lacing holes as you did with the back of the gown bodice.
Because these fabrics are so very transparent, you really want to hide any seams or flaws in fabric so this is how I attached my sleeves and it worked, it might not be the very best way, but if setting out to make your own I would consider this way, I tried a few and this was the one that worked for me ultimately. I first cut out one big poofy upper sleeve-This was cut so the fabric grain of the gown was the same as the grain of the sleeve fabric cut. I cut one big upper sleeve and then I turned the panel over and laid it out on top of the other organza sleeve piece.

Make sure the sleeve pieces are with the fabrics facing when you cut the second piece. With both sleeves, make nice big pleats along the top of the sleeves. Make sure your pleats match on both sleeves. Put these pieces aside temporarily and cut two sleeves out of the lace fabric in the same way as you cut the outer upper sleeves only this time these sleeves will be much slimmer. Add smaller pleats to the top shoulder of these arms. Don't make them too tight, but do make it so that they will stay up on your arms well. Next take a bunch of your inner shimmer mesh and crenoline fabrics you selected to be stuffed inside the sleeves and divide these fabrics in half so you have an equal amount for each sleeve. Place these aside temporarily and take one of your big poofy outer organza sleeves and the matching inner lace sleeve to match. Take your outer sleeve panel and place the lace sleeve panel so that the lace sleeve is fabric facing inward, organza fabric facing out, flip the two pieces over and sew together at the top shoulder area leaving about 1.5" in seam.
Take your inside padded mesh and crenoline fabrics and at the center of each strip attach and sew to the extra trim on the inside seam of the sleeves a the top inside. Place this (now one big poofy sleeve you have just made) and wrap it around the correct side of the gown so the elastic shoulder band you added to the bodice earlier will e hidden, and holding up the big poofy sleeve. Hand sew the sleeve on. Reinforce with your sewing machine once you get the shoulder tacked on perfectly. Do the same thing to the other sleeve pieces. Once I was finished with this I took opal iridescent trim that matched the fabric and sewed that all along the top bodice of the gown. I was careful not to mush down the sleeves where they were wrapped around the elastic straps but you can carefully tack down the pieces to the elastic on the underside if you are having issues with it. It was a difficult process but once I was finished with this trim added, I added the rest of the hand beading around the top.
Now that your sleeves are in place there is only one last thing to do and that is to finish up the lower sleeves. I made two sleeve bands wide enough to go around my wrists, wide enough to slip my hands in when finished sewing. I added the trim I wanted and then before hand sewing the upper sleeves to the bodice itself I sewed the lower arm braces to the lower ends of the poofy upper sleeves. Close up the lower vertical sleeve seams, making sure before you do so that the sleeves will be wide enough to slip your hands through. Cut small laving holes and reinforce these small holes either by hand or on a tight button hole setting.

Here the gown is shown-still in testing Mode...

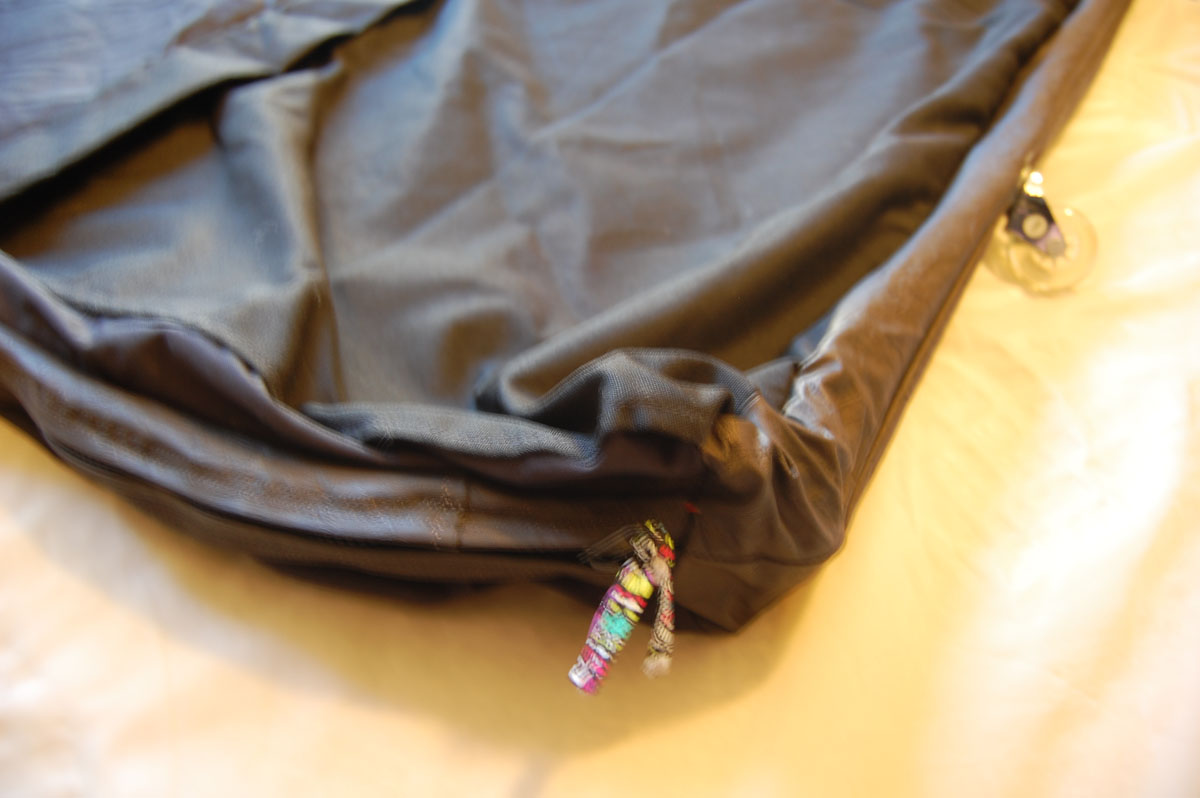
At this point I tried it on and asked my sweetie to take a few ever so quick snapshots. The petticoat was a bit too long so I ended up adding a drawstring to the underside. I made it so the front pulls up with a hidden drawstring controlled on the right side at the hip and the back is controlled by a hidden drawstring on the left side of your hip.


These sleeves are HUGE!

Here is a photo of how I got that major crinkle into the organza skirt. I went with a biodegradable non-aerosol heavy starch (Niagara) and squnched up the fabric and ironed it, refolded and squnch-ironed it again. I did this in long strides horizontally across the skirt and each layer of the skirt separately.
And then for the rest...
Corset-this was shown in an earlier blog-you can find details on how to make a corset here -> http://craftzies.blogspot.com/2013/07/making-modern-day-corset-part-i.html

Materials: 1.5 yards of white silk duponi, 1.5 yards of white lining fabric, 4 (or close to this amount-see your pattern for details) yards of plastic boning, 3+ yards satin braided trim, silver grommets in back for lacing (optional), 5+ yards of 1/2" width turquoise hand dyed silk bias ribbon for lacing in back, silver thread-optional-the ends of the turquoise trim was accented in silver thread, 10" or about that amount of 1/4" width white elastic. You will also need white thread and a big white button (I went with one that was 3/4" round-go with something similar.
There were a few additions to the corset shown in the blog post. When I made that I never intended to make this gown but having it for this project worked out perfectly. For the corset lining you simply cut out the corset pattern pieces in a lining material *keeping the bottom hem a little longer for the lining pieces, sew them together as the pattern states and then attach the lining to the corset around the top, sew, fold in and sew the sides down vertically in back, and then fold under and sew the bottom hem to the corset. You may find you need to hand sew the lining down as well as the satin trim on the corset as the boning can disrupt machine stitches.
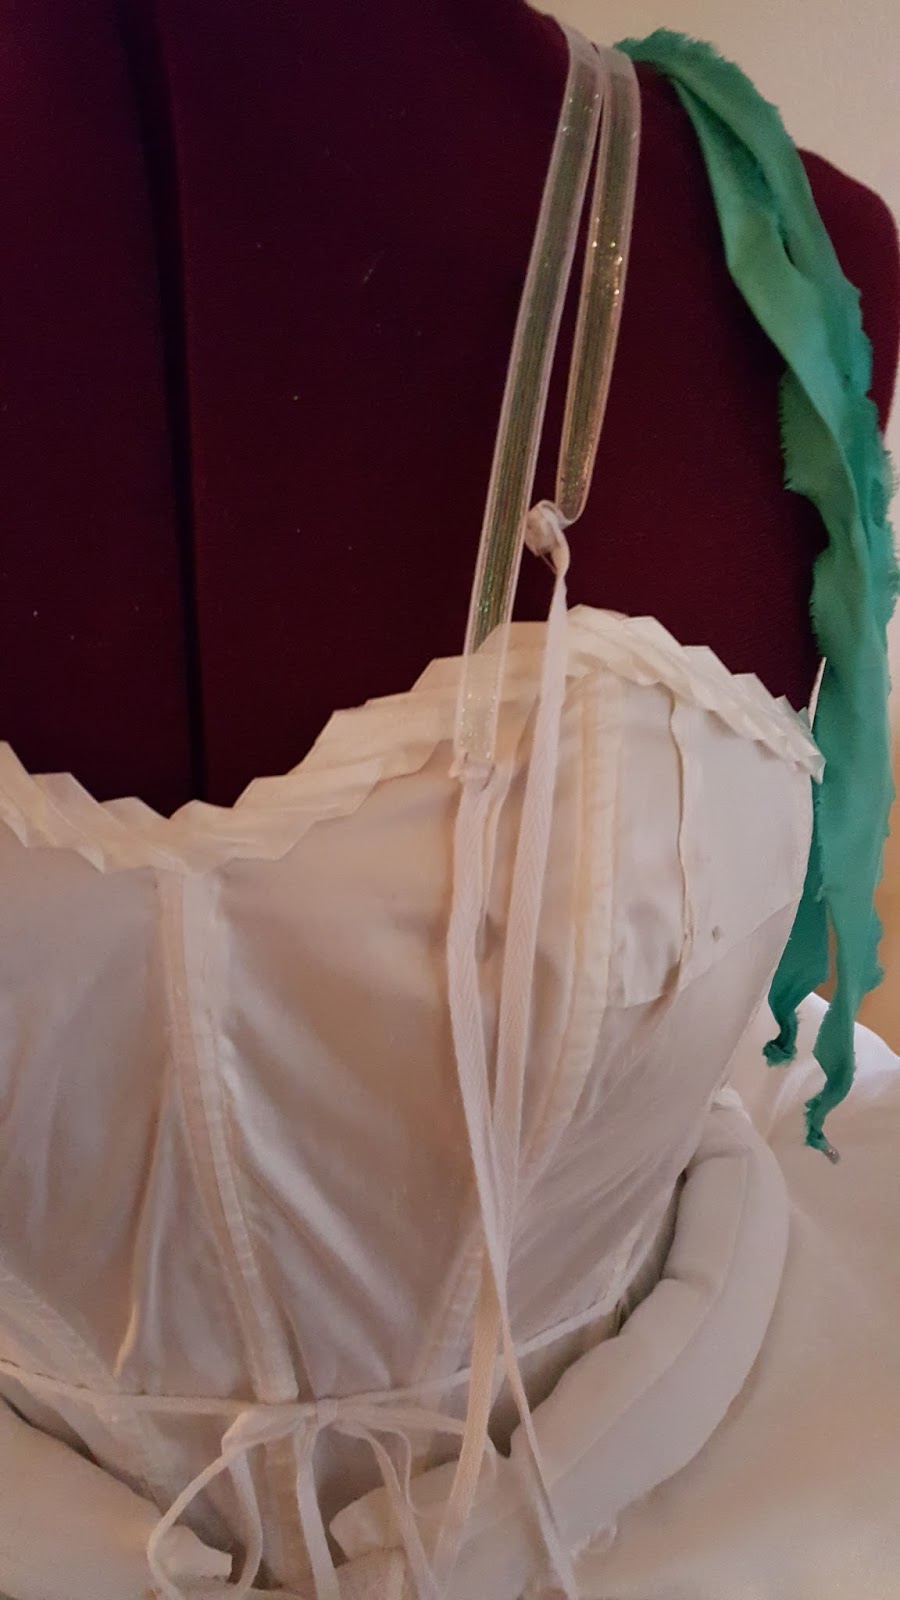
Now, whether you have purchased or made a corset, you will still want to add a few things to it in order to hold everything together. I found adding small little elastic hoops to the waistline around the corset most helpful. I went with 1/4" elastic, sewed small 3/4" tabs together and then hand sewed them to the corset. I went with about 4 tabs on each side. In the lower center front of the corset you will also want to sew in a white button. I went with one about 3/4" in diameter. This and up to 1" is a decent size for the button. You will also want a sewing needle as there is some hand sewing involved.
Hip Bolster-This was a new one for me but it really was rather easy.
Materials: 1 yard of white satin fabric, 1.5 yards of white rayon. I went with both white satin for the top of the hip bolsters and white rayon for the waistband, and then again for the bottom half of the hip bolsters but the choice is yours. If you go with all white satin then pick up 2.5 yards. You will also need a measuring tape., white thread and a sewing needle along with 1 ft of 1/2" wide elastic.
Measure your waist and make sure to add the front V for the lower front waistline. Cut one long strip of white rayon that is 6.5" in width and the waist measurement you took. Fold this strip in half wrong sides together and sew down the length, making sure you leave the ends open to fill with the polyfill. Stuff this with a long stick or something similar. Cut two 1/2" wide strips of elastic that are 5" in length and fold up the ends of the filled waistband and sew the elastic strips so they pop out of the ends. The elastic ends will fall in front. In back you will sew to the center back of the waistband really long 1/4" cotton twill tape. I then added tabs to the inside of the waistband so I could run the twill tape sewn at the center back around the sides and tying in front as shown directly below.

Next I added the actual hip bolsters. I cut out one big chubby C shaped piece out of white satin. I flipped it over so the wrong side was facing up and laid it over the other piece of white satin-this one with the fabric right side facing up and cut a satin C for the other side. Next I laid each piece over the white rayon to make underside C's for the hip bolsters. Sew the big c's together, stuff with the polyfill, and then hand sew the C's to the sides of the waistband. I also added twill tape to hold the hip bolsters together in back, I found it helped reinforce it all in back.

Lace Slip-This was a half slip so that the petticoat will fall evenly over the slip and cover up any gaps, especially in the back where the hip bolster falls short. The slip was simply a long rectangular piece with the edges folded and sewn down and then pleats were added to the waistline area. I also included a button hole so it would attach to the corset in front. It overlaps on one side and ties via twill tape at the other side. I marked the ends of these ties with hot pink felt flowers jus tto help you know which ties are which. The felt flowers get tucked in under the slip and hidden by the petticoat later on.


Materials: 2 yards white lace, white thread, 2.5 yards white bias tape. I went with 1/4" width cotton, go with something slim that your local shop carries. I also added felt flowers to the ends of the ties-optional-something similar will do I'm sure.
Petticoat- The petticoat was made with a bit of a fabric blend though primarily made of a poly rayon fabric, light, cool and sort of silky. It was a nice choice as I wanted a fabric that wasn't too shimmery but something that would cause the organza on the gown to flow over it as needed. I went with this for the top half of the petticoat however knowing that this needed to be super poofy and I wanted shimmery in some areas and such, I went with an additional 2 yards of white satin and a half yard of white shimmer satin blended in. Follow a pattern for this piece. You can make one without but assume a lot of white fabric. I added in a bit of white satin, and a bit of white sparkle satin to the tiered layers. I also added drawstring to the underside so it can be pulled up when running and such.

For the top half of your petticoat you are going to want to measure around your waist, and then go with triple that measurement. So if your waist is 27", your final measurement is going wot be a width of 81". For the length, go with slightly longer than your knee. Fold the piece of fabric in half and sew a seam vertically, this will be your center back. Fold over the top and add a straight stitch all the way around. Trim if needed. Then slip in 1/4" elastic and sew it into the top hem. Make your top elastic area comfortable around your waist. As this is a bunchy petticoat you can assume that the top width will be a few inches larger than that of your waist. Around the top, below the elastic hem you are going to want to add small button holes so you can lace this to your corset. *I would recommend waiting until you have the corset on before you add the elastic tabs to the corset, as well as the holes to lace the corset to the petticoat so you can see how many you will need and where the tabs and lace holes should fall.

Materials-2.5 yards white fabric for the top half, 2 yards of white satin and 1/2 yard white sparkle fabric. You can either mix up the fabrics or go with all one material, in which case you will need 5 yards of white fabric. 2 yards of white elastic-1/4" width will work. White thread. Once the base of the petticoat was done I really wanted a dramatic sweep in the design in front so once I was completely finished with the gown (remember I made it last to ensure it fit over the undergarments), I took all of the extra organza trim and I chipped it up into tiny triangle pieces and sewed them all together into one long trim. Then I sewed this trim to the petticoat. I started in back and tacked it about 1 foot above the bottom hem all the way around until I got to the front where I brought it up to a peak-off sides a bit-and then brought it back down and around the back again just as the other side had been tacked on. If it is as you like, reinforce the tacked on trim with your machine. If there is anything you want changed, do so before officially sewing it down with your sewing machine.
Hair Pieces- This was a bit tricky, I won't pretend it wasn't but I finally got it right. Well, as right as I'm willing to get it ya know??! So here is what I came up with. I made a hair piece to clip to the middle underside of your hair so it poofs up, and that is optional but if you want it, it's there. I took two mini spring hair clips and cut a bit off of a hair bun net. Once I unraveled it it worked fine.


Materials: Four or so mini hair spring clips (I used 2 for the hair poof, and one for each side of the lower hairpiece. The center silver piece as well as the top piece are held in place with bobbi pins), brown thread, silver thread, glue, paint, silk mini rosettes, glue gun and glue, bobbi pins, florist tape (You can probably use ribbon though I found this very helpful when binding the wire from the mini spring clips to the metal choker), silver paint, paint brush and if desired, a bit of a glitter added for embellishment,thin wire, silver leaf trim, green leaf trim, necklace choker metal frame, silver ribbon, blue hand dyed silk bias ribbon, brown netting, silver elastic, 12" stiff round elastic no wider than 1/8" diameter (This is used for the round part on the side of the head. I used this and glued it into shape. You may find something easier such as pipe cleaners? Once you paint them in silver they will stiffen up a bit I would imagine).


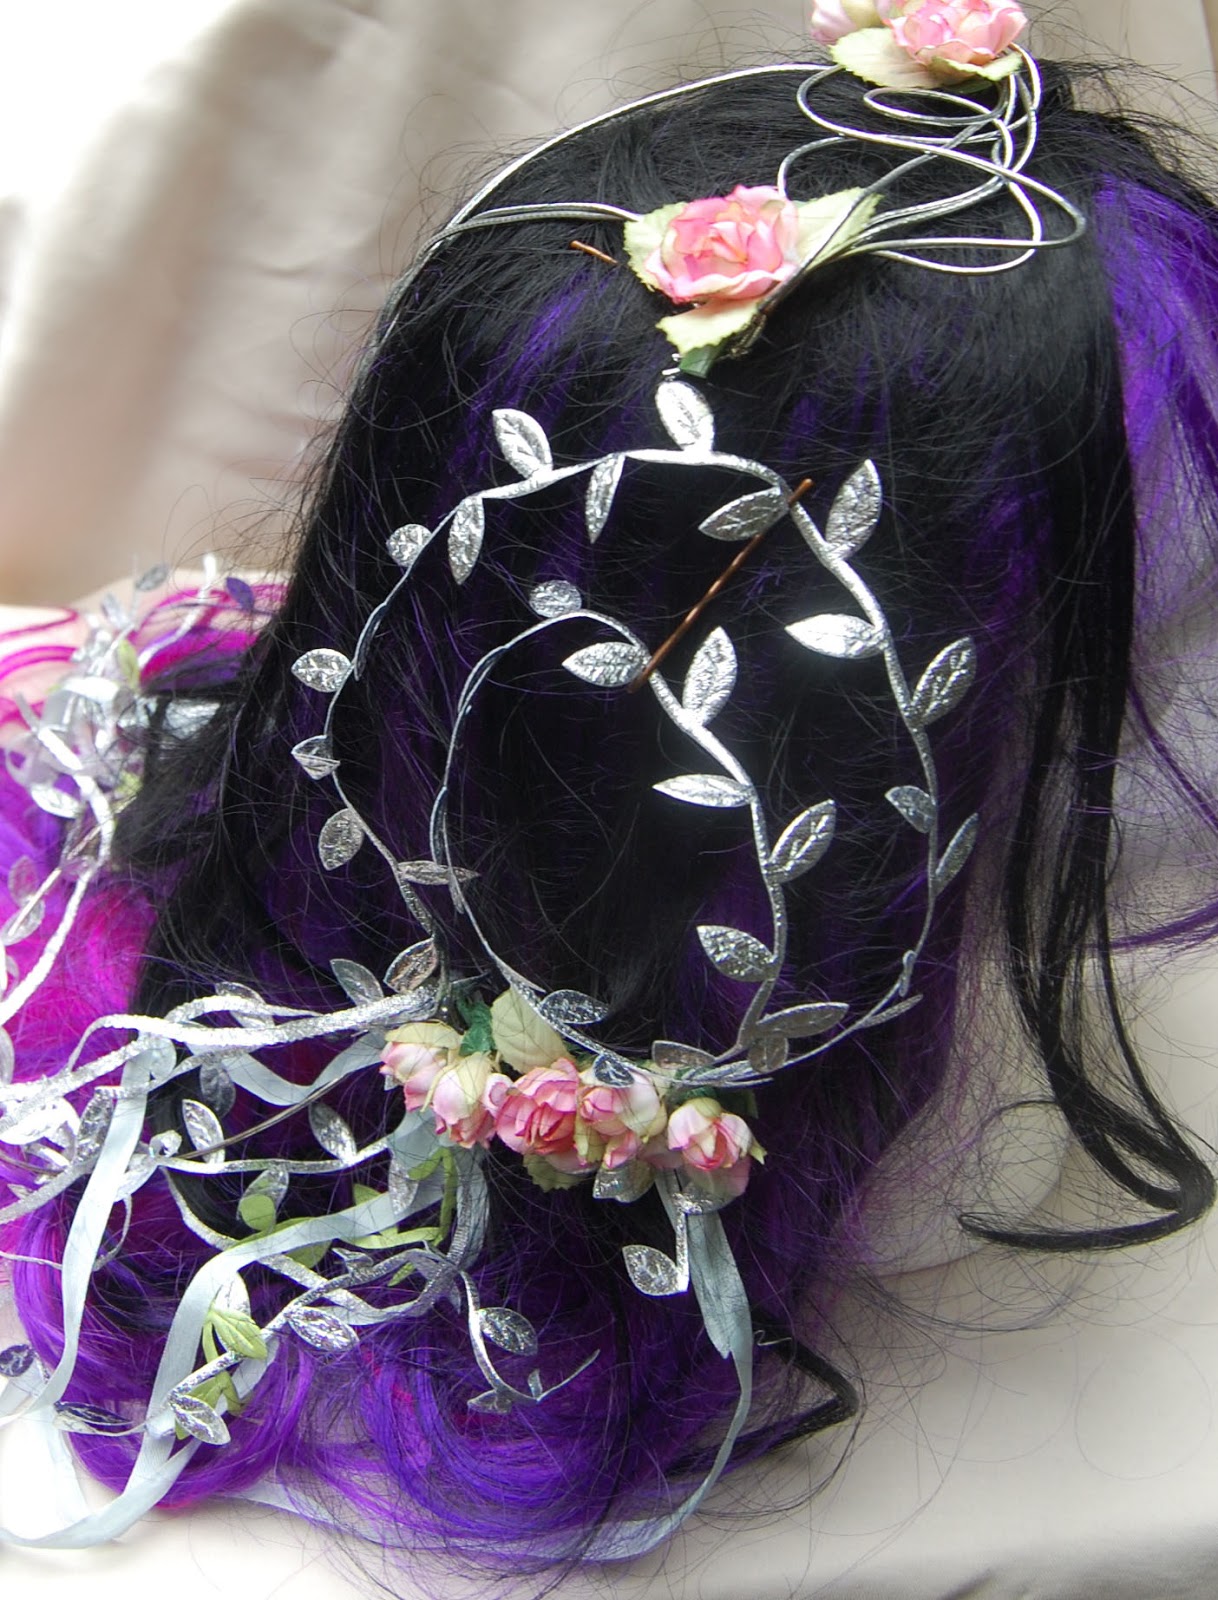
These round curved areas are supported from underneath, made to blend in with darker hair.

This hairpiece shown is comprised of two pieces as shown in the images. The top piece is comprised of two rosebud pieces that pin with bobby pins and the silver strands are lightly braided and fall down the center however I just braided them for the photos, you can pull it out and the pieces just hang from the sides. Next is the lower piece and this is designed with two rosebud spring clips-one for each side that clips a little bit down by your ears and all of those wild silver and silk ribbons hang. Attached to those is a round silver leaf design that comes up and out and gets pinned up a little higher. The round silver pieces are attached to the lower spring clips and are supported to hold that round curve from the underside, made to blend in with darker hair.


Materials: White and peach Polymer clay, cameo mold, tin foil (*and preferably, a small toaster oven because baking polymer clay in your home oven gives off a bit of fumes), Cameo styled brooch pin, glue gun and glue, silk flowers. I ended up with a little golden color on the cameo, as shown here in the photos. It was just a little colorant that came through when I merged and baked the different clay pieces together. I just ended up touching it up with a little white paint in the end.
So, there you have it. It took a long time though I admit I fussed many times to try and recreate a similar gown to the original.
Well, there you have it. It was a really fun project, despite the time it took for mwe to consitruct. For final project details I would suggest making things a tiny bit easier for yourself. I would recommend purchasing beaded trim for the bodice and waist detail. I hand beaded it and I think going with a wider strip of beading would be best.