What's Crafting?

What's Crafting?
Click here for this weeks updates...

Search This Blog

Friday, December 27, 2013

Into The Mist: Recreating the Silver Khaleesi Inspired Wedding Gown

The mist rolls down from the hills in the early morning this time of year, creating the most mystical setting for crafting such a magical gown.  After working with over six yards of a dreamy silver satin fabric I just had to share my latest costume design. This is the Game of Thrones inspired Khaleesi Wedding Dress remake, a project that took quite some time on my part, but was certainly worth the wait. Working with so very much of a silver shimmer satin really was like working with a smooth cool mist for fabric.


 I was very pleased with the way the costume turned out and though it does not fit on my sewing doll, it does fit on a smaller mannequin. Please pardon the photos, it is very difficult to get outside photos this time of year, especially when holding up the mannequin and the camera at the same time. Below you will see images with the gown with and without the brooch, as well as the set of arm accessories hung to one side.


When designing this gown I left the shoulder straps long in back so that Khaleesi can tighten or loosen the top as needed. The back has a hidden zipper and the panel in front on each side that wraps around the bodice and ties in back has small clear Swarovski crystals hand sewn up the long ties to offer a bit of additional shimmer.


Making the Dress & Arm Bands: I started by cutting out an inside waistband, making a top foam insert for the bodice, adding the base fabric to the bodice, and adding the bodice wrap pieces to the top on each side. I pinned the straps down, added the lining, sewed down the lining on the inside, added the zipper in back and then sewed the back lengthwise hem. I then hemmed the bottom up by hand (once trimmed to the appropriate length, leaving about 1.5-2” hem allowance). I finished the look by hand sewing the crystal beads to the back of the ties so it looks like rain drops. 

 *When constructing the top bodice, as you work on the gown match up the left and right size throughout the construction process to ensure the bodice on each side is exact so your bodice is proportional (if anything looks off in the images it is only because my mannequin is rather slippery, not because one side is uneven at all). Sewing such a slippery fabric onto a foam base is not the easiest so just go slowly and work out the kinks before you sew the lining down and you will be happy with the results.


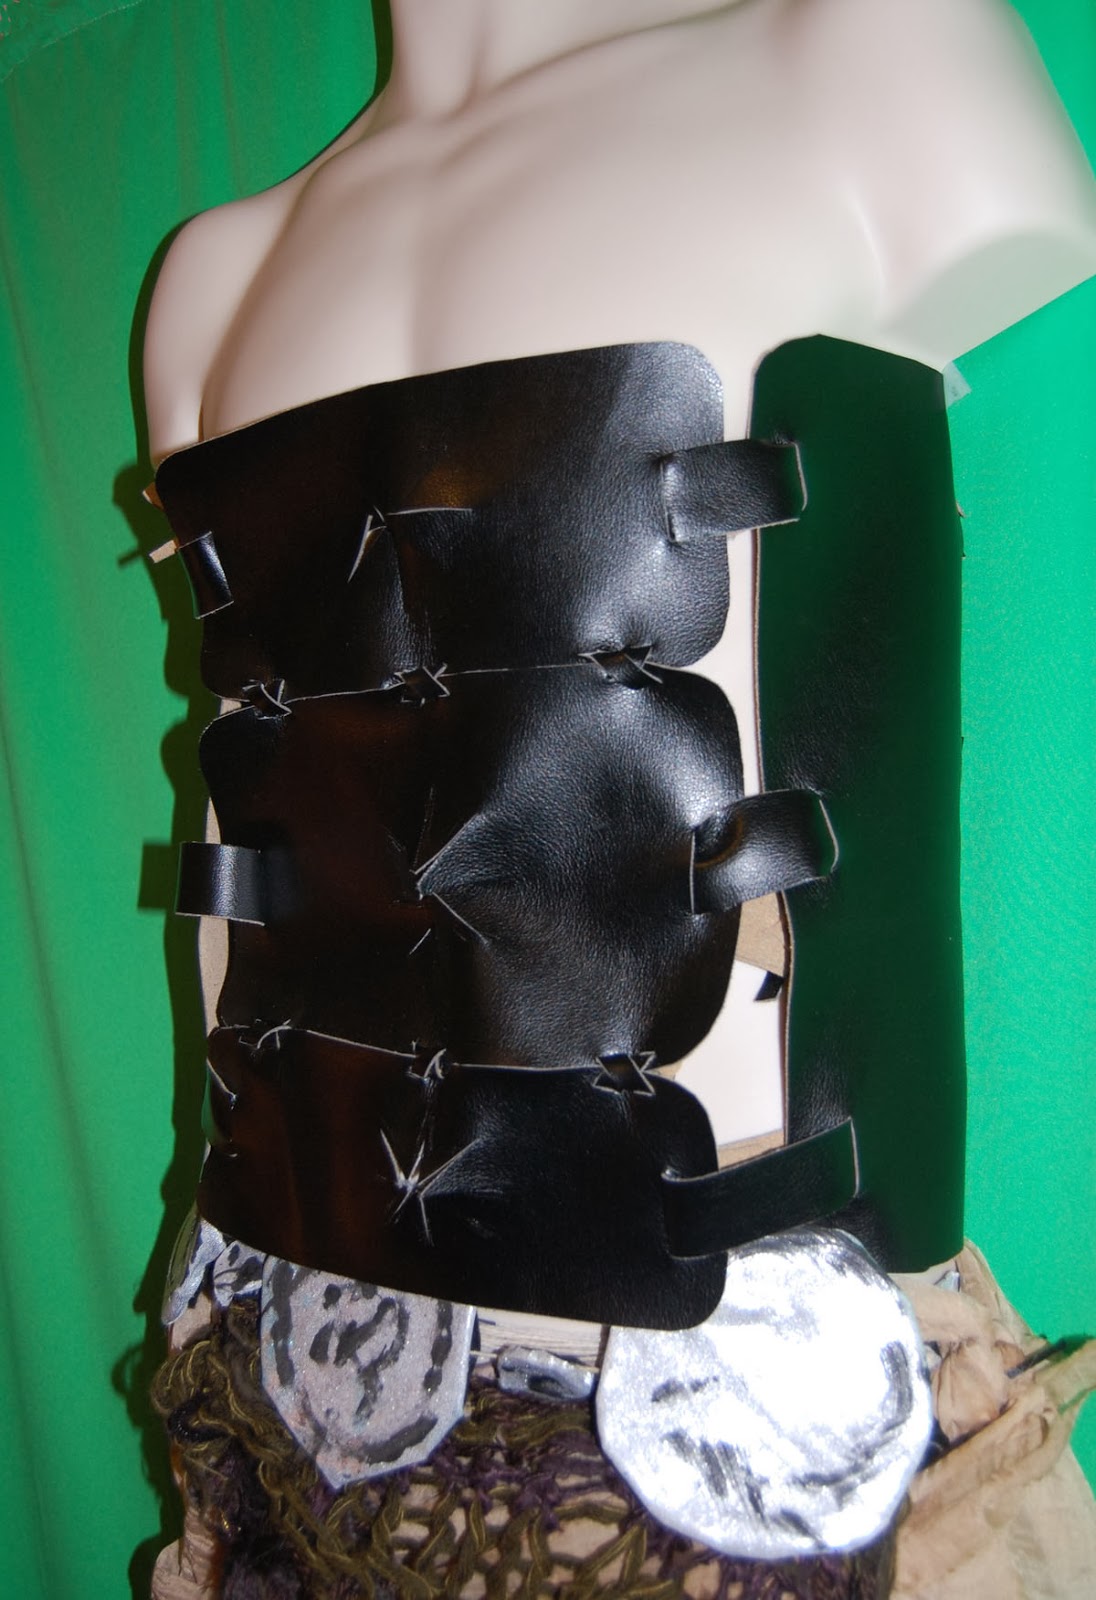
Though the finished gown did not fit on my sewing doll, it did for a short time early on in the crafting phase. Here are a few images (above) to give you an idea of the process while putting the bodice together.

Then I made the arm bands and sewed the edges of the squares. I then added the squares to the armbands. Once you have sewn the edges of the fabric squares and sewed those to the armband pieces, you will want to hand sew elastic to the inside of the arm bands to cinch them up a bit. This is optional and if you do add some, I recommend only adding about 2" to the inside by the seam. This way it cinches the back a little but the entire armband won't cinch on you. Again, this may not be necessary, you may find you simply need to pull the armband seam in a little and tighten it up, in which case you can easily slip it on and off and it looks like an arm cuff, not a piece of cinched material.

Making the Brooch: I made the pieces you see in the images out of polymer clay.  I then glued the brooch facet to the back, painted it silver, and then placed it on the gown with the top front wrap pulled through the broach piece.

Both of these are painted with Martha Stewart Metallic paints, the silver on the right and the Dorado Gold in the upper left. These are about 2" in diameter, slightly larger than the brooches of similar style that accompany the Wild Dothraki Khaleesi costumes.


Here is an image of the Brooch on the gown. I did not pin it to the dress as I want the customer to be able to do this once she has determined where it should be placed. This can easily be placed higher at the center bodice once the costume is on.

Project Notes: In total this project required 6 yards of silver shimmer silk fabric however sizes larger than a 5-6 in US Ladies size you will require an additional yard of fabric, (optional-foam or a bodice insert/ I made my own but you can purchase them at the craft/ sewing stores), interfacing, lining fabric (optional, you do not need very much-I used what was left of the outer fabric), material for the straps, fabric for the arm bands, elastic for the arm bands (most likely ½”-¾” width), thread, pins, sewing needle, clear Swarovski crystal beads, 14-16” zipper, polymer clay, brooch facet, glue, silver paint, paint brush, sewing machine, scissors, measuring tape. I also recommend gloves for when painting the brooch.


This gown is currently being offered in my etsy shop as a custom order and you will find the details here -> https://www.etsy.com/listing/173875448/game-of-thrones-inspired-khaleesi?

The fabric for this costume is a silver shimmer satin fabric, the arm bands have elastic to hold them up on your arms, and the brooch is also included with your gown and made of a polymer clay painted silver. Your gown will be made of the same materials shown here in the images. If materials change I will let you know in the listing itself as well as here.


When ordering please include your measurements (bodice, waist, hips), general size, height and the measurement around your arms while at your side. Thank you J

This image is not the best as the backside of my mannequin is hollow but you can see the zipper and how nice and long those ties fall in back.


*If you have a specific date you need a costume by please notify me before ordering if it falls slightly before the 3 week wait period. Please note that orders take 3-4 days shipping in the states and up to 14 days internationally. Items are shipped first class internationally and do not receive a tracking number. If you would like a tracking number please let me know and I will send you an additional shipping fee listing to order. I do not offer express shipping. 


*If you do not see an active listing message me on etsy and I will either list one for you or let you know the wait time on an order depending on my current order status (it changes throughout the year). The current price is $285 and the current construction time is 3 weeks once your measurements and payment have been received. 

*Measurements can be sent in the comments section when ordering or can be messaged over via etsy message separately, whichever is easiest for you. In some cases customers are ordering these as gifts for another, hence measurements sent a few days after the order has been placed. This is fine, no worries. I just ask that you double check those measurements twice for good measure ;)

Other Game of Thrones inspired costumes I have crafted:


and then the Pink and White Khaleesi Dragon Dress and Printed Renaissance inspired gowns... 


Happy Holidays!

Lindsay ;)

Tuesday, December 24, 2013

Handmade Gift Giving: Soaps & Candles


Hello & Happy Holidays. As some of you know I have been working on new items, traversing the holidays and recovering from my sister and brother in law’s fabulous wedding. If there are any of you out there that want to craft something new and also have some fabulous new gifts by morning this just might be the perfect project and I say this because if I know anything about crafts I know how to make soaps and candles. I can’t believe I have never put a post up on this before (pulls out boxes of materials and TONS of old photos to show some options when it comes to style). 


**Just a new notes on safety before we get started. First, please remember that both glycerin and wax are highly flammable, and you will want to be careful when heating and working with the hot ingredients. You will also want to open a window to ensure proper ventilation. These are not crafts for children unless very well supervised, the materials should not be left on the heat unsupervised and if at any point you feel that the materials are too hot, allow them to cool a bit before continuing to melt. Finally, please wear safety glasses, apron and make sure you do not get residue on the floor, don’t let kids or pets eat it, etc. Ok there, I think I covered that J

Making Soaps:
Materials needed: Glycerin melt and pour soap are really easy to work with and the glycerin base options of white and clear are usually available in the craft stores. Carrier oils to mix in that are going to help moisturize your skin, and those are going to be Jojoba oil, Apricot kernel oil, Shea Butter, Cocoa Butter, Mango Butter, Vitamin E. (If you have a hard time finding a carrier oil or a blend while shopping then you should have luck at a place like Trader Joes, New Season's type stores if that helps). Additional ingredients as desired such as loofah, pumice, ground apricot seeds, etc.


Project notes: Those oils listed above would be a few examples though I would say in general I would only mix a small amount of Vitamin E so I wouldn’t necessarily go with it as the main oil in your mix. Scents: Some craft stores offer soap scents and colorant from which to choose form. Soap Molds. The craft stores will also have soap molds. A glass bowl and microwave or pan and stove top in which to melt the glycerin. A Knife to cut the glycerin as it usually comes in large blocks. Melt the soap until melted and then remove from the heat and add the scent and colorant (unless the directions say otherwise). Remove from the heat and add the carrier oils and stir. Give it a minute to cool and then pour the soap mixture into the mold and allow the soaps to cool. You can also add a half or whole piece of loofah and it becomes an exfoliating bar. Adding a base of blue pumice and the other half shea butter allows for the best sports soap bar anyone could ask for, and for the kids that don’t necessarily like to get in the tub, adding a little toy like a rubber ducky or even a fun looking rope just might encourage more bath time.  

A few hints: Adding butters such as Shea to your glycerin mix will make it smoother, take longer to melt and will make for more of a white glycerin appearance when using clear glycerin. When going with a shea butter added to glycerin, most people choose for a solid white glycerin as it is already white. The shea will make a clear slightly less transparent, but in most cases will not make the clear glycerin as solid white as the white glycerin base is.

These candles were made and then carved with a knife to offer a bit of texture to the sides. The scent was Tropical Paradise.

Making Candles:
Materials needed: Tin foil, pan you can dedicate to candle making-thrift store anyone?, wick (I like cotton wicks/ not metal wicks), jar or other glass to put the candle in, scents if you want to make the candles scented, old jar, gloves, and your crafting apron at the very least. I also like to recommend safety glasses.

This candle was a color mix, all one scent and made from a medium sized rectangular metal mold.

Project Notes: If your wax, candle color or candle scent comes with directions go with those. For those that have big slabs of paraffin wax you are working with you will find these general directions should help. Yes, in general most sites will tell you that you need a thermometer, metal tabs to hold the wick down and things of that nature and yes, in a lot of cases you might but in general if you heat the wax to a high enough degree so that it is the consistency to that of grape juice and then remove the pan of wax from the heat and turn the heat off. Drop the scent in and allow this to cool a few minutes. In some cases your scent should be dropped in the wax lot before you remove the wax from the heat. I would say to do this if you are working with a solid scent. If you are working with a liquid oil I would like for you to add it either a minute or two before you remove the wax from the heat but keep in mind adding oil to a hot wax mixture makes it even more dangerous on the safety front, plus, you want to also keep in mind that all of those oils and wax should be thoroughly blended, heated properly but not cooked too long because the longer you melt the wax mixture the more you bake off the scent you just added. A lot of times a person is using a solid wax tab that is a scent. In this case you want to have time to properly melt the wax tab completely and then blend it with the mixture a bit. These are a bit stable and stronger than a liquid scent you are adding. 

This candle was made with a blend of paraffin wax and bees wax and a dried flower was added to the front. It was a little uneven until I evened it out with a knife. Burn all non-container candles on a plate or candle holder in which to catch the excess wax when the candle is lit.

If you are adding a bees wax to the mix you will find it is heavier than a regular paraffin wax and will need to be melted longer. If you are going with an all bees wax you will find it might take longer to melt and the consistency of that type of wax will be more like a heavy Orange-pineapple juice blend. If you are in search of color you will find color tabs at the craft stores and crayons also work. For mixing your wax I would recommend something like a big wooden spoon. Something you want to dedicate to the candle making. I do not like to recommend plastic utensils for candle making unless you have allowed the wax to cool to a safe temperature before lading out of the pot and such. Once the wax mixture has been melted, stirred, cooled a bit and is ready to pour take a bit and pour it into the bottom of your jar or container you have selected. Tie a knot in the bottom of the candle wick and drop it into the little bit of wax in the bottom. Allow to cool a bit. As you only added a few tablespoons of wax in the bottom of the jar it will cool rather quickly, much more so than the large pot of wax. Check the wick and make sure it is stuck in the wax bottom, if not then perhaps a wooden skewer will help you there, and then pour the wax into the mold, holding the wax wick up straight so it will dry in the center top of the candle. 

This is a Tea Tree Set and for each of the candles shown without a glass votive I have selected the appropriate wax. You will want to do the same if you do not want your candle added to a glass votive. 

If you are having a difficult time getting the wick to stay in the center you should find a pencil with the wick wrapped around it and a tab of wax added to hold it in place should help. Or even that skewer you used to hold the wick down at the bottom originally should help you there. Allow the candle to cool in a place undisturbed for a few hours so it has a chance to set. In a lot of cases you will find that paraffin wax is thinner of a wax than a bees wax and it will sink when cooled more so than a bees wax. But regardless of the wax you choose, in most cases unless you have a professional candle making business at your disposal, you will find that once the wax cools it has sunk a bit. To clean up the look of the top of the candle you will want to take that pan of dry left over wax and melt it up again. Melt it to the same temperature you melted the original wax , again remove from the heat, if a little more scent is needed add it a bit, Mix and allow to cool a little bit. Laddle it out on top and allow to cool. Once the candles are cool you can cut off the excess wick and you are all set to wrap and gift!

A Few hints: If you want more than one scent for your candles you can use the same wax pan and containers but you will want to clean them out really well with a soap and water mix to free them of the oils before adding a different scent or your pumpkin spice meets spring rain candles do not smell as nice as you had envisioned. 
And then you have the humerous prayer candle and these are great because you can just add an image you like to the front and treat it to a varnish with a brush.

Happy Holidays and may the craft be with you…

I will return shortly on a fabulous gift wrapping post. If you had one more stop to make before you head home for some hot chocolate and egg nog, you know I'm going to suggest the craft store... Well, and the grocery store for cookie makings and probably the liquor store for something to bring out the flavor in that egg nog ;) 


Lindsay

Sunday, October 13, 2013

The Khal: Constructing a Wild Dothraki Riding Costume


In honor of Khal, the man of few words, here are the basic instructions on how I made a Game of Thrones inspired Khal costume. 

Many thanks to Khaleesi Tara and her Sun & Stars as they requested a matching set.


Any questions feel free to ask. This time of year I am super busy with costumes so I like to divert all messages to either questions here on the blog or via etsy @ www.Craftzies.etsy.com. Thanks so much for stopping by and happy crafting!

Lindsay

p.s. Please don’t mind any tape that is showing in the photos. It turns out it is really quite difficult to keep slippery costumes up on plastic mannequins, especially when they don’t have a backside :p

Making The Khal 
The costume pieces shown are the fur pelt, the Khal Warrior TopDothraki Riding ChapsWaist WrapTribal Pelt (front black feathered panel), Silver BeltArm Guards + hand wraps, and Blades. *The Blades are not shown with the warrior top. Khal is going to put the costume on, mark where the cuts should be for his size and such and then score the slits and then the blades will slip inside the top.

*materials used are broken down by costume piece below.


Pelt-A small amount of fabric in a long rectangular shape will be needed. Fold up the bottom all but 3 or so inches up, sew the side seams and then fold over the top. For the pelt shown I then made a bone tooth from polymer clay with a hole in the top and then tied the tooth to the front to act as a button and tied a black satin rope for the handle. Once Khal receives his costume he will be able to adjust the rope as desired.


Materials: small faux fur type fabric, thread, rope for the handle and if desired to make the tooth, polymer clay in white or natural color, tin foil and a baking pan, oven and follow the directions on the packages for the clay, it is usually 275 for 15 minutes. Remove it from the oven, let it set for a while as it will be slightly soft once removed from the oven. Paint it as needed with gloves on, paints you want to use-I used gold, brown, a dash of white, black, natural, and such, and then flat surface to take the excess paint and allow it to dry. String or thread to attach the button to the pelt.


Khal Warrior Top-leather or pleather type material. If you would like something man made you can go with a suede cloth fabric and you will usually find it in the upholstery fabric section in a variety of colors. For the one shown here I went with half a yard of reclaimed leather. Follow along with an image online such as this one -> http://goo.gl/yW7U2v


You are going to want three rectangular leather pieces that run the front, and those are scored with a star pattern in the center of each piece. Cut those out and then cut two small cuts on the left, center and right hand side of the bottom half of the top front panel, the top and bottom of the center panel, and then the top of the bottom panel. Cut out a few long thin ¼” strips of the fabric and then bind these pieces together as shown in an X mark and tie the ends in back to bind them. Once you have the front as one piece, cut out a large piece of the fabric for the sides. 


Cut slits at the top, center and bottom on the right and left hand side of each of these side panels. Those slits will be bigger than the ones you cut to bind the X for the center panel. These cuts will be about ¾” wide and cut vertically. The cut out strips of the fabric that is also ¾” wide and pull the strip through the slits so the ends are on the backside. Leave the ends about 2” in length on each side and do this for all of the new slits so you are binding the side and front together. Once finished turn the piece right side down and take the ends and line them up so they are in a loop (imagine making Christmas tree ornaments made from paper hoops?), and then use some of the slim ¼” wide black twine you cut earlier and bind the loop together. Do this for all of the areas that are on the inside areas-the areas where the side and front pieces need to be bound together. 


Now you will want three long strips of fabric that is ¾” wide-just like the strips used to bind the sides and front together, and you are going to bind the back together. You will do this by slipping the strips over the base fabric and into the slit you cut. Then you will fold the piece back and cut a small piece and bind the piece together. Once you have one side finished so the strips are bound and the other side is open still, set up the other side in the same way as you did with the other side. Try the costume on Khal and see how it fits and then once on, size the back strips that run across the back as needed and then bind the opened side the same way as you did with the other side originally. Here are some images to help you along with these instructions.


Loop A and B together on the back side and then cut a small incision on both and bind them together with the same strips of material used to make the X marks in the front center piece earlier.

When you go to bind the straps in back you will want to slip the strip in the back on one side, loop it to the back again and cut a small incision and bind the strap to the side panel. Do this two more times down the side and then once on, determine the length of the back straps and then either bind the other side in the same matter or add a material such as Velcro to close the top up around the side. 

Materials: black fabric to serve as the black leather (about ½ yard should be enough depending on the fabric width. You do want to have the fabric wide enough to go around Khal’s back + about 8” extra for binding purposes in back), exacto knife, scissors *optional but I did use them to curve the edges of the leather pieces, cardboard or other base to protect your table top when cutting with the exacto knife.

Silver Belt- The belt is constructed by cutting out about 7-8 circles, about the diameter of the bottom of your standard coffee mug. The cut out about 8 or so small circles. For each circle cut, also cut out a back piece of felt that is just smaller than the cardboard piece. Heat up your glue gun, slip a layer of paper or cardboard under your working area to keep the surface free of hot glue, and then lay a corner of your silver fabric out right side facing down. Place the large round circle on top and about 1.5” out form the edges of the fabric and cut a large round circle. Do this for each round cardboard piece you cut out and then lay the cardboard in the middle of the cardboard piece and glue the silver fabric down to the underside of the cardboard. 


Let dry and then lay out the silver pieces face down and glue the string down to the back side center of each circle piece. Depending on the space available you may have to let a few of the silver circles and rope to dry before you can move them and continue to glue your belt together. Once this is dry then you are going to want to seal the backside of each silver piece with black felt and glue so each has a finished back with your glue gun. 

Once dry then you want to turn the belt right side up and add a little black paint to each silver piece. Let dry and then, depending on the glue you used, you may want to spray the silver pieces with a clear spray as I did so the black paint won’t rub off if you get a bit of drink on your costume ;)


Materials: Cardboard, scissors, silver fabric, hot glue gun, string/ twine, black felt, black paint, paint brush, clear spray. Cardboard or paper to keep your surface clean and free of hot glue.


Tribal Pelt - The tribal pelt was made with a variety of various threads that I knitted, dyed back and then tied black feathers and little gold bells to. This is attached with a black twine and is a separate piece. Black pipe cleaners from a craft store will help stabilize this piece if you need and if you don’t knit then you can go with a strip of black felt and cut holes in it.


Materials: knitting needles, fibers / yarns, thread, bells, black feathers.

Waist Wrap -This was a simple piece of sheer fabric that I dyed in various brown pigments, allowed to dry and then tied up in a squnched up manner so it is a bit of a rippled fabric. I left the edges raw and this can be pinned or tied at the hip.


Materials: chances are you don’t have buckets of fabric dye in your garage so I suggest if you do want this costume piece you simply pick up a long rectangular strip of fabric and tie it at the waist. For color a sand colored fabric will do nicely.

Dothraki Riding Chaps-for those you are going to need 1 yard of fabric and a pair of scissors, thread and lace if desired. These are essentially two ragged long pieces of fabric where you wrap each panel around each hip and attach a slight overlay of the fabric both in front and then in back. For my costumes I add grommets and lace the back but if you are looking for a quick costume you can staple the front and back and it’s just a slip over the head piece for your Khal.


Materials: 1 yard suede cloth fabric, thread and a sewing needle, scissors *if you have  sewing machine then you will want to overlap the fabric seams in front and back and sew together. Add grommets in back and lace if desired.

Arm Guards-For these pieces you are going to want to take the extra fabric you have at your disposal and wrap the fabric around your wrist + arm a bit. With one hand hold the wrapped fabric piece and either by hand with a sewing needle and thread or with a sewing machine, sew the wrap piece of fabric at a few points throughout to hold it in place. Cut a hole for any fingers and alter as desired to make the pieces perfect from there.


Materials: scrap fabric, thread and sewing needle or sewing machine.


Khal Knives/ Blades-The blades were one of the toughest parts of the costume and though many of you will decide to purchase some and others will go an entirely different route in the construction process, I will share how I made the set you see below. In hind sight I don’t know if I would make them this way again, though I still have not come up with an alternative so suggestions are certainly welcome. If any of you make them out of a different material and would like to share please do. I originally planned on these to be made of a grated plastic but that just did not work at all. I should have made them out of a stiff felt I suppose but after a few ideas didn’t pan out I decided to make two polymer clay rings, slightly smaller than a napkin ring, and then baked those and they ended up oval shaped. I made two foam pieces to serve as the handles and glued those into the rings with a hot glue gun. 


Then I cut out four pieces of cardboard and cut out two long blade pieces. Take one of those pieces and cut the area that will be glued into the handle down so it fits into the ring/ handle and let it dry. Do the same with the other knife and let dry completely. Then take the other two pieces and fold the end that will fit with the handle and other side of the blade and fold over the end about ¼” and glue the folded edge down and up against the other side of the blade. Once this sets then go back over the piece and seal in any openings on the sides of the blades so it is sturdy. Once the glue has set then paint the blades, spray them with clear spray if you think it will be needed and you should be all set. Once you have your khal warrior top and blades finished you will want to cut two slits in each side panel of the top so as to hold the blades in place.

Materials: foam for the handle, cardboard for the four blade pieces (two blades put together to make one blade in the end, you will want one blade on each side of the warrior top), various paints and paint brushes for the blades, hot glue gun and glue sticks, clear spray if desired, cardboard for keeping your surface clean from the hot glue gun and scissors and cardboard for the blades.


Final crafting notes: *I did not make a pair of khaki pants/ capris for this costume but I am sure Khal has a pair of pants he can wear that will work just find for this costume. My final suggestion when binding the Khal Warrior top would be to not bind the pieces together too tightly. You want movement between the pieces so it will have a little bit of give as Khal moves. 

*Be careful with glue guns, they can get really hot! *Always use paints and especially spray paints in a well ventilated area and with a decent surface cover. * Gloves are always recommended. Your manicurist will thank you.