What's Crafting?

What's Crafting?
Click here for this weeks updates...

Search This Blog

Sunday, June 17, 2012

Happy Go Holiday!


Inspired by Holly GoLightly’s sleeping mask in the classic Breakfast at Tiffany’s, I decided it was a perfect time for a mini holiday and a Cosmo, but first I need my ‘On Holiday Sleeping Mask and tassled Ear Plugs!’ That’s right, summer is here and I’m not letting another moment pass by without sleeping in and getting some quality shut eye. The parties my dear, the parties… 
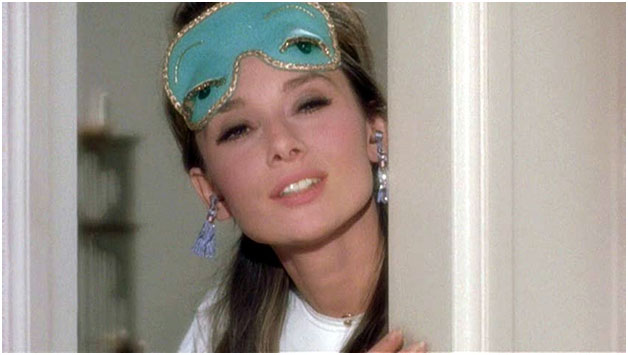

 What better way to sleep in and forget about the world than with the fabulously remade Audrey Hepburn inspired Sleeping Mask and those perfectly fashionable tassled Ear Plugs? Ohh and yes darling, they are divine. That’s what design + fashion + necessity is all about. Fabulousness at its finest!


So go ahead and enjoy a lovely little get away, whether it’s at your desk on a quick break, sleeping that last seven minutes before class begins, at your favorite spa or actually on holiday. Either way these will help with the rest and you will definitely be feeling the breeze ;) 


I had no idea there were so many versions of this mask out there until I was searching the net for some photos of the original. I was simply hand sewing something spectacular one day and thought…Breakfast at Tiffany’s will help make this go a lot faster (and you know once I was reminded of the sleeping scene in the beginning that I just knew I needed my very own!). I was very happy to find all of the materials when I hit the shops.


I sleep under a big beautiful window so a sleeping mask will be quite welcomed, not to mention when traveling. I also seem to lose those nude colored ear plugs when traveling so tassels will only help making finding them easier on the go. For the sleeping mask, I wanted a solid black backing as well and had a nice silky black so I went with that for the backside, with a stiff interfacing for the middle, black mesh to cover up the eye holes under those heavy eye lids.  


I’m very happy with the results and I have a few listed in my etsy shop if anyone wants a lovely little Breakfast at Tiffany’s inspired Holly Golightly Sleeping Mask (link here: https://www.etsy.com/listing/102347897/breakfast-at-tiffanys-inspired-sleeping )

and if you’re in the mood to craft, well, here is how I did it…


Sleeping Mask: Materials needed:
blue felt
gold & blue thread
interfacing
gold trim for the eye lashes & eye brows
Gold trim for around the outer edge of the mask
Elastic or string to hold the mask in place
Black mesh (small amount to cover the small eye holes under the eye lids-optional)
Scissors


Sleeping Mask: Instructions:
Take the felt and cut out the eye mask shape. Once you have the shape you want, cut out a piece of interfacing and the black lining for the underside of the face mask. Cut small holes where the small round holes are going to be (these will be covered up with black mesh to offer some visibility while also keeping the light out. The holes will also be covered up by the big eye brows once the mesh has been put into place). Back the small eye holes in the blue eye mask with the black mesh pieces and sew around the eyes so the mesh is held in place. Cut the small eyes in the piece of interfacing and the lining piece in the same places as you did on the felt. Lay the lining piece over the interfacing piece and sew close around the edges so they are now one piece. Add a tight zip zag stitch to seal the raw edges where you cut the holes for the eyes. Place this backside piece to the side for now.

Cut out a set of big eye brow pieces, add the gold trim and sew the eye brows to the face mask so that the eye lids cover up the black holes almost entirely. I have seen a few masks where the black eye part was lower and popping out from beneath the eye lids, your choice here. Depending on the notions you found to make this project, you can either use the trim you got for the braid around the mask and pull it apart and use a piece of the strands to create the eye brows, or you can go with just sewing on eye brows with the gold thread. I say go with what you have and you will find it works perfectly ;)


Sew a piece of elastic or string to each side of the felt and then place your lining piece wrong side up on top of the felt piece, tuck in the ties you added to the sides of the felt and sew all the way around the face mask, leaving a small space, about 2” or so side of unsewn space, so that you can turn the mask right side out, and then tuck in the seam and sew the mask closed.


Add the gold trim all the way around the mask and tuck in the end on the backside and seal with a small left over piece of felt so that the ends of the trim do not unravel. Turn the sleeping mask over to the backside and hand stitch around the black eyes so that the blue felt layer and the lining layer lay flat together.

And You’re done. Now don’t you want those lovely little tassled Ear Plugs?

I thought you might….


Tassled Ear Plugs: Materials Needed
set of tassles
set of ear plugs
Blue thread
Scissors
Sewing needle

Tassled Ear Plugs: Instructions:


This is an easy one. I originally planned on using glue but before hunting down the appropriate glue I decided that just plain sewing the tassles on might just work. It did. The Ear Plugs were soft enough that I could easily thread the needle with a blue thread and sew them on and then if there is any excess like a look or anything of that nature at the top of the tassle, you can just wrap that around the front facing part of the ear plug and sew it down. You are going to want a pretty slim needle so you don’t tear up the ear plug form, but I found I could put in quite a few stitches and it didn’t lose form or start to tear in anyway and the tassles were on really well I didn’t feel as though they were lose or weak in anyway. That’s it, you’re all set!

Just a quick note here for customers: When I originally made this set I wanted it to be as authentic to the original as I could and that meant going with the shale-blue colored tassles. Since then matching teal colored tassles have since come in that match the mask itself perfectly so when ordering you are free to request matching teal ear plugs (please put that into the comments when ordering-Matching Teal Ear Plugs) then I will send the teal as opposed to the original shale-blue colored tassles :)

Aren’t you just darling…

So go on holiday darling and dream (& craft) up something spectacular!


Happy Holiday!

Lindsay ;)

p.s. These will work for Halloween costumes too ladies! ;)

Wednesday, June 13, 2012

Baby Be Stylin’


The news is in, it looks Ed's brother and sister in law are going to be having a little girl, and we couldn't be more excited! We are going to make the best aunt and uncle ever! And definitely don't get me wrong, we would have been excited whether the little munchkin to be was a girl or boy, that doesn't matter in the least, it's just kind of fun to know when thinking about the baby gifts. That's right, I said baby gifts ;)

We also woke yesterday morning to see the most adorable little 2 year old Hockey pro with her dad after the Stanley Cup Finals (congrats on the win everyone!) and so you know those two events alone were going to inspire a baby gear clothing post from me for sure. Talk about keeping it real. Isn’t she the cutest?! I love when she has the mic and she’s pointing. If that doesn’t shout “Daddy’s time is valuable. I’ll speed this up. Next!” I don’t know what does. Just for the record, despite how this post is titled Baby Be Stylin' I think it's important to mention that she appears pretty grown up to me ;) (Jonathan Quick & daughter @ the Stanley Cup postgame press conference MVP- http://sports.yahoo.com/blogs/nhl-puck-daddy/jonathan-quick-adorable-daughter-wins-stanley-cup-postgame-043609321--nhl.html ).

I told Ed our little niece is going to be just as cute! This post is definitely going to be ongoing because right now I have made a limited amount of baby clothes and accessories, just those really requested by customers or made because they were kids prints and I had extra fabrics to use up, but if this doesn’t inspire a some baby hockey gear from me I don’t know what will. We be fans here ;) 


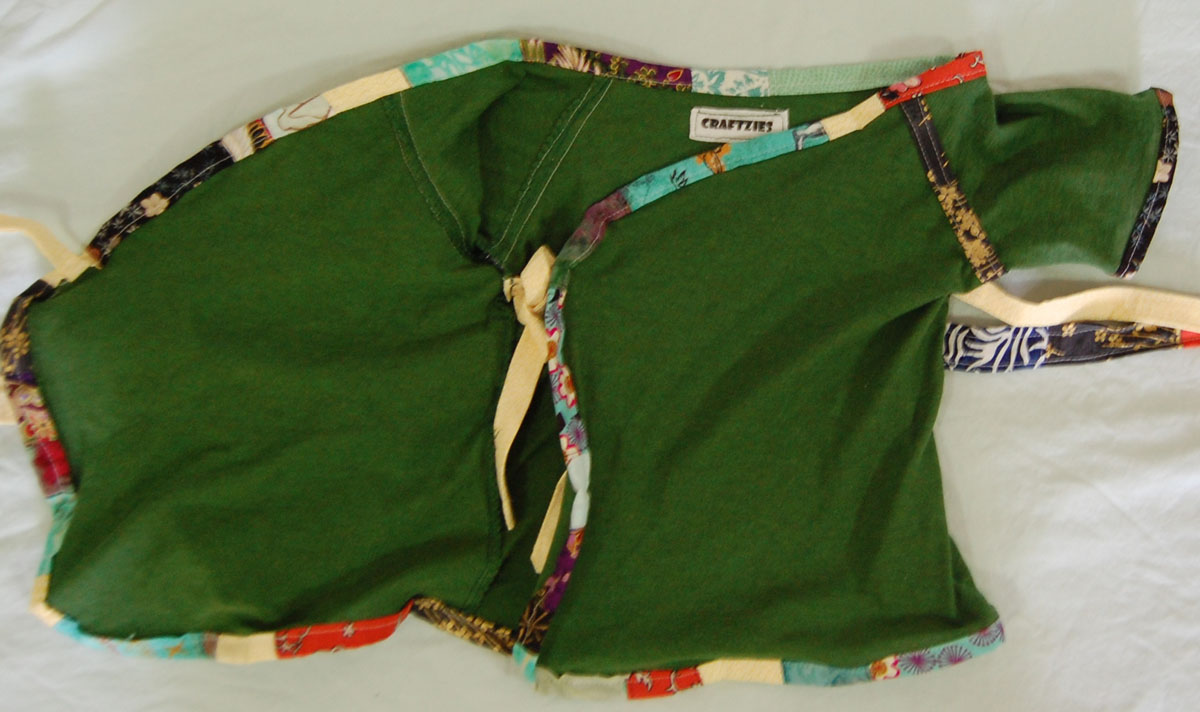
About a year ago, maybe a little longer, a customer requested I make her a little Baby Kimono and Diaper Cover Set. She was expecting a little girl and she said she was able to find little kimonos, but they were all cotton and she wanted one in a soft jersey fabric for when she brought her little girl home from the hospital. I have always taken on different types of projects that I found interesting (yes, like the 4 ft high paper maché elephant I made for someone years ago for a kids science class-it took up pretty much the entire kitchen of our smallish apartment for weeks-my boyfriend is the BEST! ;) and this one was no different. It was going to be new, and I like those new projects at times. I don’t take them all, but I do take a lot of them when the project interests me and since I was considering making a female adult sized kimono inspired robe for an entirely different customer at the time, this was a pretty good excuse to take on the project at the time.


 So I found a pattern in the stash and thought, if I elongate this one-add the trim for accent and the same cotton print on the diaper cover, I think that just might work perfectly. Round one, where I was using a jersey fabric I had in my fabric stash, proved a decent test, however I originally didn’t add the cotton trim for accent, and you can see it really boosts the cuteness factor. So later on I made lots of changes to the original pattern and made a new one. I have made a few of these for customers since and right now have 3 on my orders list, 2 the same and in the Big Wave Baby Kimono cotton print mix for the trim, in a 0-3 mo. in purple jersey. I then have the same in a 0-3 mo. in grey. I like to keep some of these in stock that are in various sizes and I haven’t had a 0-3 mo. size as a ready-made item yet so I am going to make a whole bunch.

These take a really long time to make, hours and hours, but by creating a little assembly line for myself I do save a bit of time. I am definitely going to Toggle the time it takes to make these so I have a better time frame. I have made sets of 4 at a time and it feels like 2 days so my cutie would say that means I was in the craft room for 4 days at least, but if I do toggle my time this time around, I’m sure to have a better idea and you can’t beat that, it will always help with time management. Good Lord, who ever thought I would use those 2 words in a sentence unless the sentence started with “things that make no sense to me?” 
Here are a few of the Baby Kimonos I have made so far for customers. I try to get photos before I ship them, but I honestly get so busy if I didn’t ship some of these things without photos they would just take forever to get out in the mail and no one wants that.


This last set shown above is of the most recent set I have made and included the baby kimono robe and matching diaper cover in purple jersey fabric sized 0-6 mo. plus a hooded bath towel to match and a set of 3 washcloths. 

All girls love playing dress up!


 Accessories:

(Little Diaper Bag-waterproof/ lined portable)


(Pirate themed baby blanket, white jersey crib top sheet, travel changing pad and mini diaper bag)

Alright well, I am off to the craft room to whip up some more of these. In the mean time, here are some dresses I made recently for the little girls. When we’re in the midst of monsoon season out here in Portland (and yes, it comes on strong and lasts for months BUT it makes for the most gorgeous warmer months you’ve ever seen ;) photos aren’t as fabulous as they could be, but these aren’t terrible. I finally got around to setting up the green screen and work on lighting in the boys’ room a little bit. They don’t mind using the space for photos sessions for Craftzies products and Sophia clothing since they know that space is also going to be used for their brand new Giz+Obi blog! Woot! Yes, yes, they have their own blog now, where they can show their stuff to the world. www.GizObi.Blogspot.com ). I really had no other choice; they’re just too lovable not to share! And not only have I not even put a dent in the photos I have of them, but we haven’t even gotten started on new photos! But more on the human fashions for now...


 (Umbrella Girl Dress)


 (It's a Zoo in Here Party Dress)


(Blue Floral Flutter Dress)

Anyway, now I’m just thinking I need to make a little astronaut outfit, a little hockey outfit, & a little bunny outfit of course (because I know Pat will laugh when I send a baby bunny outfit). Yes, yes, I happen to have a pattern for a baby bunny outfit. I would say I have no idea how these patterns find their way to me but I do know. Sales! Fun sales too like resale shops, online, garage sales and estate sales. I just found a few more baby patterns I picked up when I heard Stef was expecting. Ohh yay! More sewing is on the way and I don;'t usually do the bay thing but we do want baby girl to Be Stylin' 

Have a fabulously stylish day, congrats to Pat and Stef on the news of their soon-to-be little one, and of course congrats to the LA Kings for their win, even though there is great sadness in this house because the Sabres…the Sabres… (sniff)

Lindsay ;)


P.S. Here are some new items made recently in Little Onezies sizes…

This is a roll up travel Diaper Changing Mat. It is made with a red suede cloth  fabric on the outside and a grey multicolored striped fabric for the inside.


 It has two decent sized pockets on the lower half of the inside to hold a diaper or a little wet/ dry bag (included with the set though I don;t seem to have images). It is made with a thick batting, and then an extra batting pillow piece with purple corduroy for the head area. It also has an adjustable waist tie to attach to a diaper changing station when out and/ or for keeping that munchkin from rolling away while you look for those diapers and such while out and about.

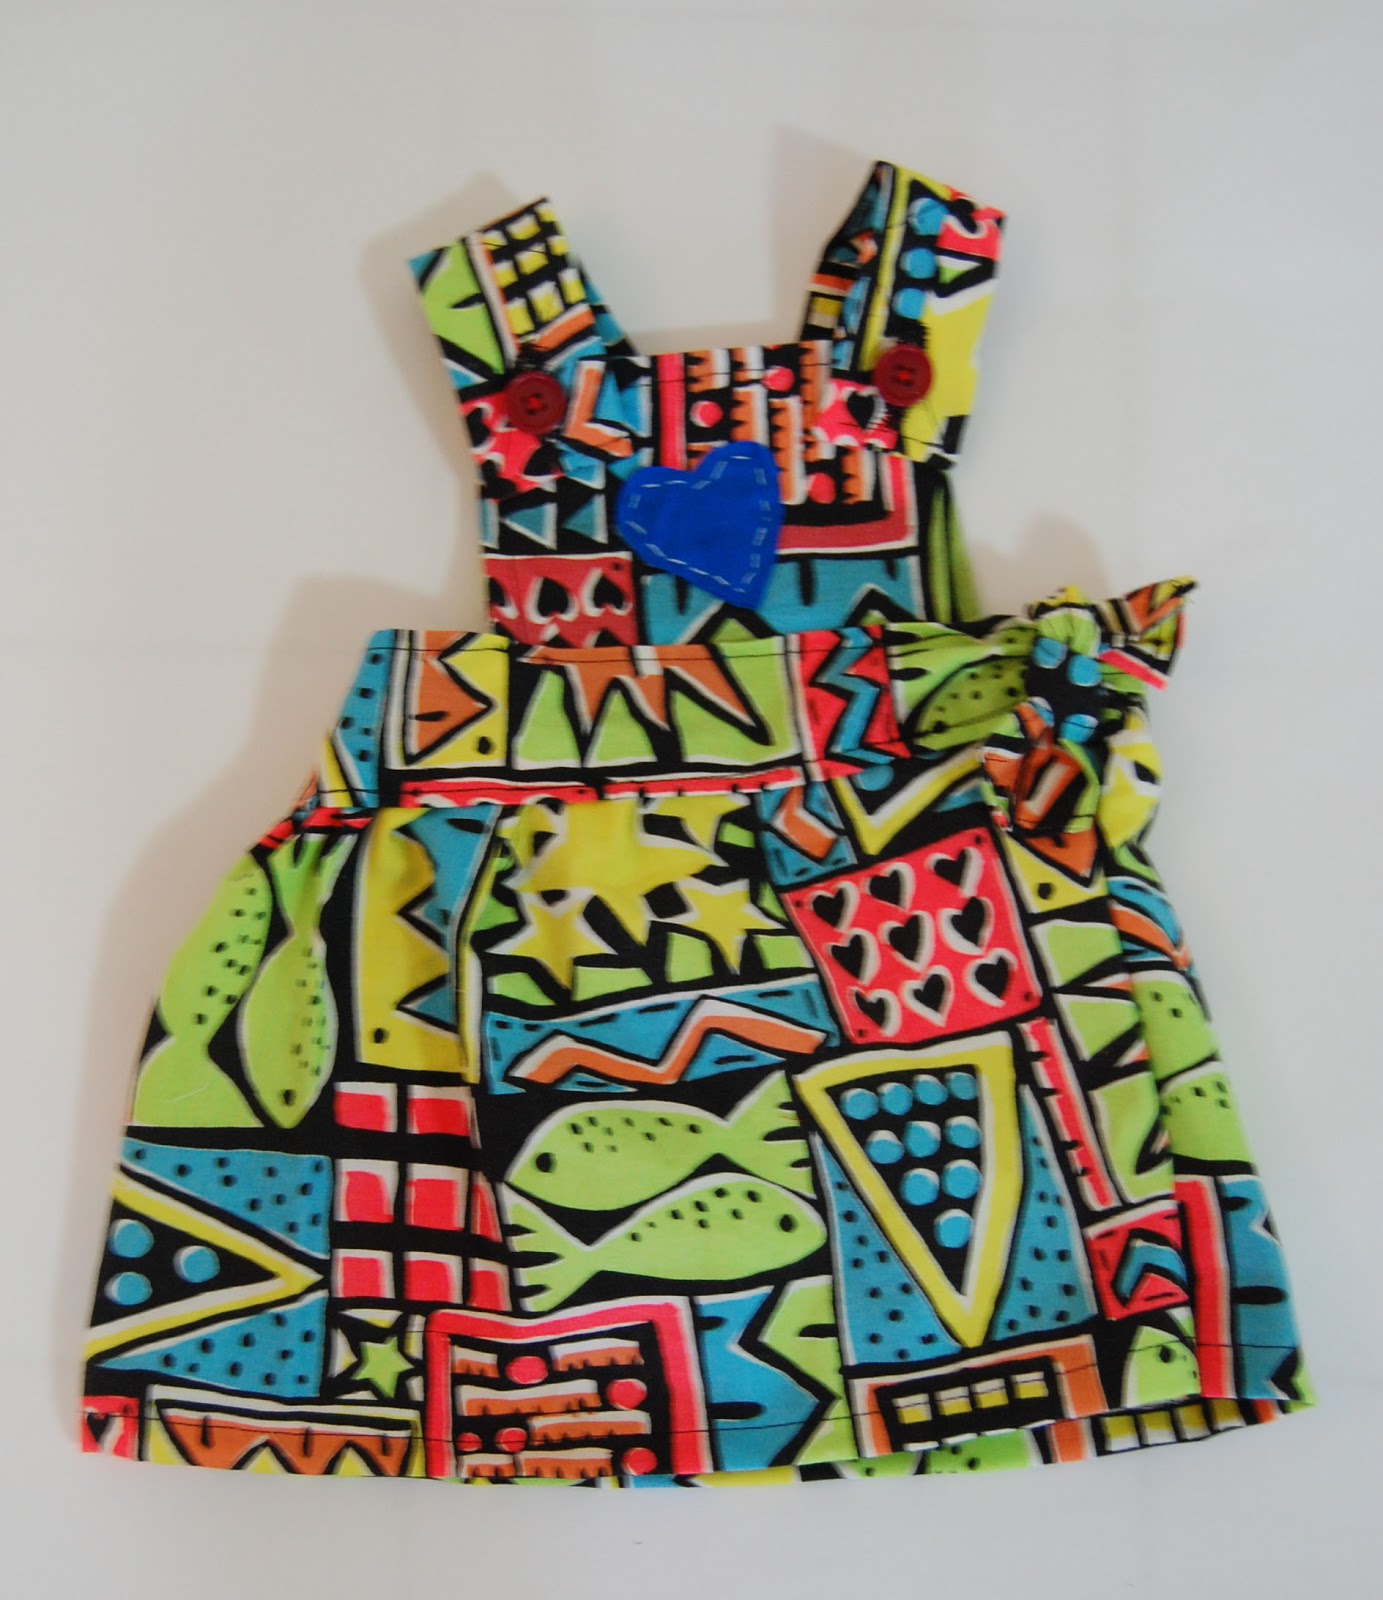
And then I have what I have dubbed the Baby Hip Hop Outfit and it is a little jumper with a tie on one side so you have some size adjustment in the waist. 

with matching bandanna of course!

and a few more Baby Kimonos...


Space Travel Robe Set with a natural colored tunic and a brown outer robe. 


Both made in a 12 month sizes and made out of a soft jersey fabric.
and then a cute little fleece and brocade printed blanket...