What's Crafting?

What's Crafting?
Click here for this weeks updates...

Search This Blog

Sunday, January 22, 2012

Dreaming of Dresses

Blue Velvet Dream & Beyond

Spring is in the air these days, and maybe that’s only in my mind as we are still in monsoon season out here in Portland and I know many of you are wading through some heavy snow throughout the country right now, but never the less, I am feeling the energy of the season approach!


As many of you can probably tell by my most recent posts, I am in fabric heaven these days. For those of you who are like..what on earth is this girl doing and why has she been so scarce?, well, I’ve actually been sewing my little heart out. I can’t seem to help it though, I’m driven by my desire to turn fabric into lovely little fashionable items! My hands are pretty worked these days but since early December I have been working on a number of new items, many of which are dresses I am going to show you today.  I also have a number of new items on the cutting table including 2 vintage dresses, one in black linen and another in this gorgeous Audrey Hepburn styled dress in a really cool dinosaur pattern for my sister (her pick. If little sister wants dino fabric she gets dino fabric-I don’t believe in limiting a girls personal style ;), a pair of black pants that are really going to be nice for Spring and Summer, a new sleeveless blouse with black corset for underneath (the sleeveless blouse is rather sheer), a number of clutches, wallets, tops and more dresses. These items will be listed on Craftzies and Sophia (www.Craftzies.etsy.com  + www.SophiaDeLaMer.etsy.com) depending on where I think they will work best.


Some of these items have been made for a family member, customer, or even myself such as the case with the Blue Velvet Dream Dress.  I found the color on this velvet to be so very unique and being one who loves all shades of Blue, I saved this velvet for at least a year before finally deciding on an item worthy of its lovely fibers. I love this dress and made it for my sweetie’s holiday party this last year. I wore it with a pair of black heels and a black velvet jacket. I styled it based on the fabulous sewing book The Party Dress Book by Mary Adams.


For my birthday I had asked for the Party Dress Book and it will be an all time favorite for sure. Many of you might know how fantastic this book is and I of course could not agree more! I originally decided without a doubt that I had to have this book when I saw a really nice review online for it. I believe I ran a search on Amazon for sewing books and it came up, and then I ran a Google search on the book itself to see what others were saying and to see if there were any pictures. Well, all those lovely other seamstresses and fashionistas out there have put up so many lovely reviews, and quite honestly, it was the reviews and photos that really sold me. HAD TO HAVE!! I can’t really remember which review in particular it was that sold me, but here are three nice detailed reviews that show how really great this book is.


 I’m not going to bother putting up a detailed review of this book myself because so many others have done it justice, but when you’re finished looking at all of these fun photos of new items I have been working on, definitely check out those links above and see how gorgeous this book truly is ;)


So, here is the Blue Velvet Dream Dress.  I styled the bodice with the bodice pattern from the book, and for the skirt I went with more of a straight skirt with darts in front. When the dress is on the mesh underneath is less visible. I went with the blue velvet for the bodice and skirt, soft black mesh sewn to the top bodice across with a zig zag stitching and black mesh straps. I went with a blue lining with black mesh for the petticoat, and for the waistline I went with black lace with Swarovski crystals and a black velvet ribbon in the middle. The lace was about an inch wide and I really wanted a waistband that was at double that width so I picked up double the length needed and I sewed the black lace facing up and then matched it up so the other strip faced down, and I hand stitched the lace on to start and then took it to the machine and then reinforced with machine stitches carefully. Then I ever so carefully sewed the velvet ribbon on top of the seam where the lace strips touched. Having hand sewed down the lace first kept it from bunching, and then I slowly sewed the velvet ribbon down.


I didn’t run into any problems really except in the future I plan on sewing velvet using a stabilizer because I found it bunches a little, and that doesn’t seem to change when I widened the stitches either. I was using my pfaff 1122 (ohh such a beautiful machine!), but when I found the velvet was bunching slightly I switched machines to my pfaff tipmatic/ triptonic. That machine is so different, and another really fabulous machine. I figured the tipmatic would handle the thickness of the velvet a bit more, but again, I didn’t see a less amount of bunching. Maybe slightly less. A friend has suggested a stabilizer so I’m definitely going to try that soon with some more velvet items. I would have liked to get some of those velvet items made and listed before the holidays but alas, that did not happen. Since we’re still in colder weather, and knowing Fall of next year will again be a super busy season, I am definitely planning on making a number of items before the cooler weather passes. No one wants to sew velvet and other warm weather fabrics in the warmer months!


For the petticoat, I followed the recommendations in The Party Dress book and made that out of the blue lining fabric I matched up to the blue velvet and then a black mesh and black tulle. I left the bottom hem of the velvet raw, cutting the front out just a little shorter than the rest of the dress to show the petticoat just slightly. I added a hidden zipper in the back and there you have it, my ohh so pretty Blue Velvet Dream Dress!  Since I do not have any more of this blue velvet (well, not enough for another dress, but you will probably see the rest of this velvet mixed into other items as time goes by) I am going to stop in and see what velvet colors are available and then list those for custom orders. Matching up the other materials to those colors won’t be a problem. For lace, since I don’t know if the crystals are available on the lace in colors other than black, we will just have to add them with our own mini crystals and some diamond glue. Certainly a project for another day but I guarantee we can remake this and similar dresses in different colors, it is possible!

The next dress is the new  Romantically Involved Dress and definitely one of my favorites! This dress has been made with a white cotton fabric and around 120 or so white fabric petals cut out and sewn to the bodice. The sweetheart styled bodice is outlined with a red bias tape as well as around the bottom hem of the dress. The bottom half of the dress features a full skirt in which I used the skirt pattern from The Party Dress Book, and I added detail including lace, ruffles, ribbon and bias tape. The petticoat is made with a really soft, lightweight white knit material and tulle in white and red, which also throws shades of pink where the white and red are layered. The back of the dress features a hidden zipper and red lacing up the back.


Originally I just added the zipper but found it was a little bigger than I wanted, so I added some of the white lacing I had used for the skirt vertically to each side of the zipper, and then I used that lace to lace up the back with the red satin twine. I really liked this addition because for a strapless dress, you can make sure you have the perfect fit no matter what. No one wants a loose fitting strapless dress and let’s be honest, we all fluctuate slightly in size depending on the temperature, the undergarments we are wearing with the dress, etc. so having the opportunity to alter the bodice size slightly was a nice feature in my opinion, and it did not make the skirt look bad in back at all, I found it to look just fine as the skirt went down the back. 


This  Romantically Involved Dress is currently listed on Sophia as a custom order. I have the original and plan on listing it, but because it was a larger size, I decided to list it as a custom order, and once I have a few more items listed, I will begin to list the originals as ready-made items. So, if you love this dress and you’re a 16-18 in size, shoot me a message over on www.SophiaDeLaMer.etsy.com and it can be yours! The ready-made items this season are all going to be marked slightly lower than the custom made items if only because they're done and ready to ship.


The Peruvian Dream Dress is a dress that is not new, but gaining popularity in that it makes a comfortable, sleek, sexy dress and can be worn just about anywhere whether it’s the office, running errands or even out to dinner with friends. Someone once messaged me via etsy asking why this dress was named Peruvian Dream. One morning after the dress was finished and on the sewing doll, and I was sipping a lovely cup of coffee, staring at the dress and thinking up a name, I looked out the window and saw the mist rolling in from the hills. On the weaving loom sat a purple silk wool scarf partially finished and it was in that moment that I realized Peruvian Dream would be perfect as the colors of pretty Purple Dress with olive green Obi belt reminded me of the lush colors used by the Peruvian Weavers. This dress has been requested in hot pink and in black as custom orders. Here are a few photos in purple and hot pink.


This item is currently available in the clothing shop as a custom order in a variety of colors, and I also have 3 of the purple currently in stock in a medium, large and xl at the moment. I believe I have only 1 ready-made dress in purple listed in the shop but the others will be listed soon. In the mean time, shoot me a message via etsy if you want a different size or color and I either have it in stock or I will be happy to make you one as a custom order.


Next I have The Marilyn Dress and this dress is again not a new one, but I wanted to include it seeing as this post is on dresses, and this is by far my most popular dress. People seemed to like it so much that I got a bit tied up making these and was unable to move onto new styles until now. I have made this in classic white with a white sparkle waistband as seen here in the photo and many customers have ordered this style and color. I like to keep a ready-made dress in this style in stock, and if you like this dress you can order a custom dress or the ready-made one I currently have in stock on Sophia.


I have also made it in cream colored silk duponi as a custom order for a summer bride and this also turned out quite lovely. The photos were taken on one of the warmest and yet windiest days so the photos certainly don’t seem to do it justice but in person this turned out absolutely perfect and featured the most delicate accents such as a diamond button at the back neck closure and an understated sparkle waistband. Another dress I made, this one again in classic white, was made as a custom order for a lovely customer of mine. She always picks the cutest prints and embellishments, and in this case she requested a boa added to the bottom hem. It was winter when these photos were taken, again not the very best, but it gives you an idea of just how elegant this dress is in person.


Here we have a photo of The Marilyn in Classic white with a Boa for detail around the hem of the skirt.


This dress is fairly popular in white solid fabrics however it has also been well received when made in patterned cottons as well. I have two currently listed as ready-made dresses, one in Pacific Batik, and one in Pink Hyacinth. Neither of these fabrics are available as custom orders any longer as I am out of the fabric but similar fabrics can be used for custom orders. For the Pacific Batik Dress, I went with the nicest batik fabric with ribbon for accent at the waist. The back of the dress features a hidden zipper for closure and the bodice is lined in a soft sand colored tone.


The Pink Hyacinth Dress is exactly the same only with a dynamic pink and orange print which just shouts high vibrational happiness to me! You don’t know what I mean by that? Buy the dress! Lol.  It’s just so bright and cheerful you can’t help but look like you’re glowing. The bodice of this dress is lined in a light pink fabric and as is currently available as a ready-made item in my clothing shop. And for those of you who don’t like sleeveless dresses, this looks fantastic with a sweater or bolero.


Next we have The Cherry Marilyn and made from a Michael miller cherry print. It was a custom order for the same customer who ordered the classic white with the boa for the trim at the hem. She requested the cherry print for the dress and a red + cherry print reversible print for the bolero. The bodice is lined in a soft pink for the bodice, full skirt, pink and white ribbon for the waistline, and a hidden zipper in back. The jacket was 100% reversible and I have to say, again, her pick for pattern with the matching bolero made a really cute outfit.


Last but not least I am including The Victoria, and this dress is so pretty and absolutely stunning in person. I'm working on getting photos on a model, but until then all I have are a few photos of the dress laid out flat. This dress was originally made as a custom order but more are coming soon since I now have the pattern in various sizes. This dress was a pattern I designed in which you have a dynamic navy silk duponi (an ever so hard to find color it seems-thank you Mill End!) and a lining to match. The skirt is ever so lightly gathered, the entire dress is lined including the skirt, the skirt offers hidden pockets, and there is a hidden zipper in back for closure. This dress also features a removable halter strap and 2 removable shoulder straps so you can wear this dress with a halter strap, with regular shoulder straps, or strapless depending on what you feel like.


So, that’s what I have so far for dresses. I have a few more to share but this post is running a bit long and the rest are a bit more MOD in style so I might as well stop here and add the rest in a separate post on MOD designed clothing. I really liked each of the styles shown here and yet am also looking forward to a number of new styles. Im looking forward to making the McCalls 4425, the Advance Tea Party Dress, The Wiggle Dress, and well..I can’t give it all away at once, but a whole lot of dress happiness to come for sure!

Next is either a post on new corset-styled tops or Chewbacca Slippers..I’m not completely sure just yet but I guess you’re just going to have to check in again soon as see which I decided to go with next huh? Until then have an awesome weekend and happy crafting!

Lindsay ;)

Saturday, January 21, 2012

Portland’s Finest Crafting/ Hobby Shops

(My list so far ;)

This morning after having returned from one of my most favorite shops I was inspired to take a moment and give a shout out to some of the really awesome stores I rely on to make my crafting magic happen on a daily basis. These shops are in the crafting / hobby department, and local to the Portland Oregon area. Having moved here from the East coast about 5 years ago, I am the first to admit that my at home crafting habits do keep me out of the Portland crafting scene, but it’s time to switch things up and get shopping for some new supplies and see what’s out there! I have just recently begun to explore the crafters paradise that is Portland Or. Very fun, I’ve clearly moved to the right place ;)

And so, with that in mind, here are some of Portland’s finest crafting/ hobby shops I have found so far, any why I love them so very much! If you have some places to add please don’t hesitate to say hi and let me know a place you might really love. And please also know this is most certainly going to be an ongoing list. Like I said, I’ve only just gotten started, so definitely be patient as I check out the scene. Now go grab your purse because we’re going shopping!


#1) Willamette Print & Blueprint: Since the word on the street is that the 12th st Willamette Print and Blueprint location might be closing by early summer (I say “might” because they’re not closed yet so there’s still hope!), I am going to start with this place. Though this might not at first seem like a place I would visit often, I have found this print shop to be an excellent resource for printing copies of patterns. I have both vintage patterns and my own pattern designs printed here and they do a really great job. In the past we became accustomed to the blueprints with the blue background and the white print such as in this photo.


Today the printing process is rather different and blueprints are made with black ink on a white paper (they offer other paper options as well) as you see here with the rolled pattern print in the background of the image.


Here is their website: http://www.wpbinc.com/ I have gone to both locations and talk about fantastic! It’s not fair to keep the secret so I will share-go here for your large scale printing needs because these guys are awesome. I have all of my sewing patterns printed here. My boyfriend has computer plans printed, and more of our hobby project plans will be sent over soon I’m sure (3-D printer here we come!). It’s not just a little thing here or there that’s great about this place either. This place is all around a solid shop, and I have been to both locations, and both seem to be equally nice. I have worked in the printing industry before, so I can honestly say that from a printing perspective, they have some super pretty machinery over there. You’re dealing with top quality printers and really friendly, informed staff. You don’t feel like you’ve interrupted someone’s magazine read to print up ‘your stupid thingie.’


Did I mention their prices are the very best? No, I didn’t? Well let me not forget that little detail. Just for comparison, another small, local print shop not more than a few blocks away, charges over $3.30 per sq. ft. Office Depot charges $2/ sq. ft. This gem of a print shop charges 18 cents a sq. ft! Once you run those numbers you know what I’m talking about! So all in all, if I were to grade them on a scale of 1-10, they definitely get an 11. And yes, I can do that, it’s my blog!

Final Review: Awesome little print shop-go here for prints! You will love the results!

#2) Mill End Store: Next, I would love to share my major like-affair with Mill End Fabrics. Here is their website: http://millendstore.com/ This place is the best! I think a lot of natives know about this place and it is well loved. The moment you walk in you can see why-hello fabric happiness! I have lived all over the country and seen my share of fabric stores. One of my favorite places of course was the garment district in NYC. Love is in the air..its like you can smell the fashions before they are even made. Ahh happiness. So anyway, when I fall in major-like with a fabric shop, you know it’s a keeper! And this place is so very lovely.


Both locations are just fantastic in the selection they offer. They don’t joke around when they say they have the world’s largest selection of fabrics. They have a helpful, friendly staff. When I ask a question, they are happy to answer. They will order fabric and ship it between locations for you, the staff is as friendly in the shops as they are on the phone, and the materials are simply top of the line. I’m talking absolute, without a doubt, top of the line materials.

This place has never failed to impress me. I pop into the Beaverton location on a regular basis and they almost always have what I am looking for. The Milwaukie location is larger and the selection is greater but both shops offer a really nice assortment. They do not have a website where you can see the merchandise online, simply contact and location info, but that doesn’t really matter to me when it comes to this shop. It just forces me to go in and see how fabulous their items are in person.


These shops also take competitors coupons and honor then up to 25%, a nice little treat for someone who sews a lot, and I believe they also offer 10% off if you show that you own a business. My rating for Mill End, both locations equally of course, would again be an 11. I think it’s fair to stick to something close to the 1-10 scale, but again, it’s my blog post so I can do what I want ;) 


*photos show fabrics from Mill End

Final Review: Hands down, the best fabric shop in town!

#3 Fabric Depot: Fabric Depot is another really nice shop, and they are located in SE Portland. Here is their website: http://www.fabricdepot.com/ My general opinion is usually if I don’t find what I’m looking for at Mill End, then I go to Fabric Depot. Fabric Depot is a really big shop and like Mill End, they have a large selection of fabrics. Their site says they are locally owned, they offer the largest, most complete fabric store in the country, and over 20k fabrics to choose from. Not bad! When you arrive you might feel lost in the vastness of the shop, but the fabrics and staff will make you feel right at home. They also have a very large selection of Amy Butler, Michael Miller, and other well known fabric names and I have found a number of really popular prints for fabulous prices. They have a really impressive selection of delicate shabby chic fabrics as well, a collection I have a difficult time finding for customers elsewhere. If I am looking for a specific print for a customer, I also have great success finding it here.


They only have one location, but they do have a website with some merchandise. A lot of people must shop on their website because fabric will be listed and then gone a day or two after so grab it if you like it! I also like this shop because they are local to me, and I can send this website to my customers to pick out their favorite fabrics. Not only do they have a website where you can order merchandise, but they also allow you to place your online order and then pick it up in the store. This is really awesome because this shop is a bit of a drive for me, and not one I go to regularly. Before I head over there I love to look on the website a day or two before my trip, make my online purchases and pick those up while shopping in the store itself. They usually say to give them a days notice with online orders so plan ahead and place your order online a day or two ahead of when you are planning your in-store trip to avoid any delays when picking up all of your new fabrics.  A few times a year they also have a large flat fold section of fabrics and I usually find a nice variety of fabrics for a really decent price. Don’t forget your coupons to this shop as every little bit helps when it comes to the crafting expenses. This shop definitely gets an 11!


*photos show fabrics from Fabric Depot

Final Review: fabulous, BIG fabric and craft shop with just about everything you would ever need for projects. Nice staff and I am always pleased with their prices. This is my other favorite fabric shop besides Mill End!

#4) Pendleton Woolen Mill Store: I really like this shop, and though I haven’t visited in quite some time, the last time I was there they were split into two shops, one with their higher end fabrics (and they are absolutely stunning might I add), and their less expensive shop in back where I pick up fun salvage supplies. Here is their website: http://thewoolenmillstore.blogspot.com/ This is also the link to their salvage info: http://thewoolenmillstore.blogspot.com/p/scraps.html I usually hit up the less expensive sections myself because I can find strips of really nice wool pieces for a really great price, extra weaving supplies, really nicely priced fabric by the yard, and really nice notions such as buttons, etc.


When I look at the prices of their woven fabrics in the links provided by their site I’m not really all that surprised. I know that $65-$75 seems like a lot for fabric, and they’re not all priced that high, but it’s also important to recognize that this is not just any fabric shop either. This is top of the line woven wool in some of the most dynamic, traditional prints and I don’t know if you have to be a weaver to really appreciate the workmanship here, but this place definitely gets an 11 on my scale in that their work is really impressive.


I truly appreciate the styles and dynamic workmanship that goes into making these lush fabrics and anytime I have a customer mention a Southwestern style I head to this shop for the project. Even if the customer has a rather tight budget and $65+/ yard fabric is not in their budget, I would still visit to pick up some salvage to work into the design, as well as some of the truly unique notions such as a variety of silver buttons, etc. that I can use with less expensive fabrics so I can replicate the rich look these woven designs offer. All in all, I was impressed by their prices, the diversity in what they offer, the level of workmanship, and it is always a nice trip when I stop in to see what they have. As they are located across and down the street from the Milwaukee Mill End location, I like to stop in when I am making my Mill End trip. Both the front shop and the discount shop in back offer plenty of inspiration for new projects. This place gets an 11 for sure!


Final Review: Another great Portland shop! Great finds and really decent prices for the quality you receive when purchasing their merchandise.

#5 The Knittn’ Kitten: And last but certainly not least, I will end my list of my favorite local crafting/ hobby shops list today with this adorable little shop (don’t worry, I will add more as the crafting shopping continues). In comparison with the larger shops, this place is just the tiniest, but a trip has always proven to be a fun and worthwhile trip. Here is their shop website: http://www.knittnkitten.com/ I see this shop mostly as the Grandma’s closet of crafting shops. Just like my Grandma always seemed to have a spare set of crochet needles or a bucket of yarn, scrap fabrics that would make the most perfect new project or something of that nature (anything to keep all of us girls busy with crafting projects!), so too does The Knittn’ Kitten have a vast array of fun crafting notions. Because everything is said to be an extra from some other project at some time in the past, the prices are great and you can afford to pick up that knitting project and see how you like it without dropping a vast amount of money at a commercial crafting store.


Many of my projects have been made with their materials, whether yarn used in weaving projects, bias tape used for dress designs, and even their super priced vintage fabrics that I have mixed in many times over to make items such as ereader pouches and other such accessories. Hmm…I was just going to refresh my memory on how to crochet again (sorry Grandma) so I can make this adorable little Viking hat! Woot-Maybe it’s time for a trip to The Knittn’ Kitten! So, to end my current top craft & hobby shops in the Portland Or. area, this place also gets an 11!


Final Review: great prices, unique little shop with informative and friendly staff. Definitely head here for fun finds and don’t forget to chat with the ladies about the local Portland crafters circuit-they are always so friendly and knowledgeable. You never know what you’ll need for that new project and this little shop is a great place to start for sure! 


*Photos of some materials found at The Knittn' Kitten
Alright ladies and gentleman, I’m off to work on some projects. I can’t just write my blog all day..sheesh! Besides, I am working on a new Euro Blouse (yes, that's it's name until I come up with something better)...hopefully just the prettiest little top but since the fabric is sheer I’m planning on making a solid black corset to go underneath. Let’s not scare the locals with indecency ehh? I do think the corset pattern (see my old blog post titled A Corset of Course: or a Flair for the Dramatic-see my 2010 blog posts...there were only 2 so it shouldn't be too hard to find ;) will work fine for under the blouse though, I just have to extend the length slightly and drop the bottom poplum skirt. It turns out that the corset is a really nice pattern though and I should have myself a solid new corset style to offer on Sophia soon, along with the blouse itself. And with that hopefully a better name than Euro Blouse...

See you soon and have a great day! Go support a favorite local shop of your own and get crafting ;)

  Lindsay


Pattern Remake: Creating Something New

I am a sewing maniac, I know, but if you love to sew then you might really find this to be a fun post because I am going to talk about how to make your own sewing patterns from scratch as well as how to copy and or remake professionally printed sewing patterns. There are many advantages to both and once you have gained a bit of experience sewing you will find yourself creating your own designs, and with that your own patterns. Copying professionally printed patterns is also very helpful in that you can alter the copy to your body shape, which in turn will make future uses of the pattern easier as the alterations you need have already been made. Making a copy of a vintage pattern is also very useful as you preserve the original.


I have spent years working off of sewing patterns picked up at various shops and thrift sales and from there I naturally moved onto creating many of my own clothing patterns (some perfect and others never to see the light of day!). Today I find those opportunities, the form offered by the patterns and the unconventional experimentation of making my own creations, have most certainly prepared me for an exciting sewing future. I could not be more thrilled quite honestly because I feel like I haven’t even really gotten started. After having physically copied so many sewing patterns from the original collection, scanned over 735+ sewing patterns, moved over 42+ sewing pattern boxes when we moved twice and then officially returning them to their owner, I am now so very ready to get started!

An old traveling trunk in the sewing room contains the contents of my sewing patterns, many tried and others as of yet untested, but as I sew away I find the need to make my own patterns off of those originals for a variety of reasons. I don’t always make a copy, I usually try the pattern out first if it is something simple, but making a copy gets you off of wearing down the original pattern, and let’s be honest, preserving those tissue thin patterns is tough enough so making a copy will only make your life easier if you decide to use the pattern again.

Let’s start with how to copy a printed pattern first, and then work towards how to make your own patterns. I have found this short list of supplies to be very helpful in copying the patterns.

Materials Needed:
-White paper * I use white paper as I have large quantities of that available, it is easy to add notes to the paper and I find the white paper will easily roll and print well through the rolling printer beds at a print shop if I decide to have a professional copy of the new pattern printed up. I have however known people to use anything from white fabric, interfacing, brown shipping paper, wrapping paper, tracing paper and even newspaper to copy patterns so you can decide for yourself what type of material will work best for copying your patterns.
-Pencil/ sharpie
-Ruler or other flat tool in which to smooth out the original pattern. I usually have 2 long rulers on hand to keep the paper flat when tracing.
-Tape (optional though recommended if planning on having a professional copy printed at a copy shop when finished making your pattern)
-Copies (optional-recommended if planning on having a professional copy printed at a copy shop when finished making your pattern)

Getting Started: Once the original pattern is cut, lay the base paper out on a flat surface and then lay the pieces of the original pattern out and begin by tracing around the edge of the pattern where the cutting line would be. Do each piece separately, and take your time when tracing. If possible, iron out the pattern pieces on a very low heat-though if any of the pattern pieces have tape, you will of course want to avoid any heat to the tape. *When working with vintage patterns, I find pieces of tape added at times, so I like to mention it in case you run into this. The main point here is to make sure the pattern pieces are smooth before you trace the outline and begin to add the pattern details that are printed on the original pattern. This is where the ruler comes in handy. I actually use two for the bigger projects such as copying the McCalls 4425. I recommend using at least 1 ruler or other flat surface, and also tracing in pencil before using the sharpie. You can use a pen but I really like the clear lines a sharpie offers.

We are going to use the Advance Tea Party Dress pattern for the sake of photos here. This pattern came to me already cut and it is a pretty old pattern. I ironed it out ever so carefully and then smoothed it out while tracing around the edges in pencil. Using pencil allowed me the opportunity to erase any unwanted lines as I traced. This level of detail will ensure you have a near perfect copy of the original pattern. The very best test (and yes, I like to be obsessive about it because I don’t like a pattern copy to have a bad cut-if you cut the copy badly, the sewn garment is going to be bad and no one wants that!) is to make a very detailed, concise copy and then remove the pattern from the traced copy below it. Then, add the printed pattern again on top and smooth it out with your ruler and see how accurate you were. I always recommend doing this before you trace over the pencil with the sharpie.

Once you have done this initial tracing, simply copy all of the text you find on the original pattern onto the copy. In some cases this is as easy as writing “fold here” or something just as simple on your copy but for the more complex patterns, a bit more detail will of course be needed. It is at this point that I take the pattern to a photo copier and copy the text that is on the original pattern. I then cut and paste those copies to the main copy. You can also use tape or a glue stick in order to add the areas of photocopied text to the copy. I have used both and have not had any problems, however I would recommend steering away from a wetter glue such as an elmers as you don’t want the paper to get too wet and then ripple on the copy as the ripple marks will copy over when you have your copy professionally printed, and if you are photocopying the text instead of hand writing the text, it is most likely because you are planning on having a professional copy printed (or you just have really bad handwriting?).

For a pattern such as the McCalls 4425 that was by far one of the most detailed patterns I have copied before as there was a lot of printed text and a number of darts. So, by now you have traced the outline of the pattern pieces as well as the inside text and details such as darts. If you have a lot of darts or details of this nature, make sure you copy all of the info to the copy, and one of the best ways to make sure you get the darts lined up correctly on your copy is to make a heavy circle in pencil through the printed pattern onto the copy. When you remove the copy you should be able to see either an indentation where the dart should be, or a light pencil marking. Darken these areas on your copy so the marks are clear when you go to reuse your new pattern copy.

Sizing adjustments: This is also the time in which you will make any and all adjustments you need to make if you are planning on making multiples of this style in the same size. If you have a pattern and you are petite and the pattern offers a petite version, you will most likely want to cut the pattern petite as well at this point, as well as fit to your size, before you trace out your pattern. I personally make a copy of the original pattern and label it as such, and then I make myself a copy if I need to that has the alterations, if I am making this for someone and have the measurements on hand. In a lot of cases I end up simply making the size adjustments to the fabric while cutting out the pieces, but the choice is yours depending on what is the most useful to you.

For example, if I were going to make a top and it was a simple front and back style I would add a half inch to each seam when I cut the fabric to allow for the seams. If I were making the bodice of a dress and it was 3 pieces in front stitched together and 4 pieces in back, I am going to want to make sure I leave a half inch additional fabric again for each seam but I am also going to want to make sure I leave about 1.5-2” additional fabric on each side of the back zipper region to allow for the zipper. Always leave a smidge more fabric in the back skirt when sewing a dress so you can have the back smooth and sewn perfectly after you have added the zipper. If you are working with slippery fabric then you will also want to cut more fabric and sew the seams more, most likely with a stabilizer of some sort, and sew those seams a number of times to ensure the fabric doesn’t unravel at the seams on you. The other unwritten rule is to always cut a smidge more fabric than you think you will need, always, and definitely for a lining of a garment. You can always slim a garment down, you can’t always make it bigger. When enlarging or slimming down a garment, just make sure you have all of the pieces in equal relation to one another. When making a corset, to enlarge or slim down, I would make sure each of those pieces I was putting together was equally larger or smaller in order to get the correct fit. If you imagine something such as a corset top, you would want all of the pieces stitched together so that the front seams were where they should be to offer the maximum support, the side seams do indeed run up at the sides, and the back seams also stitch up the back as they should. You can easily alter a pattern if you keep the 'equal through' rule in mind. And then, when in doubt, practice on inexpensive fabric first to see how you did before you move on to the really good materials :)

You now should have your entire pattern copied out on the paper and either the text from the original handwritten or printed and cut and pasted on the copy in the same manner as seen in the original pattern, and now simply need to trace the pencil marks and notes with your sharpie. Use your ruler to help you keep those lines straight. Once you are finished making your pattern copy you can either take this pattern to a print shop and have a copy made up professionally for yourself, or simply as a ‘working copy’ to be kept in your pattern stash. I usually keep all patterns I have worked on in a large gallon zip lock bag and keep my extra pattern copy in the bag along with the original. The bags also help store all pattern pieces that don’t fit as easily as they once did in their original envelopes.

At this point you are finished and can go ahead and cut that copy and get to sewing or whatever else it is that makes you happy. I know it might seem like a bit of a no brainer for some of you, but I found these simple techniques to be the best ways in which I was able to make accurate copies of patterns.

Making your Own Patterns-We covered how to copy a pattern, and now that we have an idea of what to look for when it comes to pattern design I thought it would be fun to cover a few ways in which you can make something all your own. So many of my customers contact me with the initial “I love these ideas..but I need it in my colors and these details and changes. Is this possible?” and I always love hearing that because that’s what making all of these things is all about, making it yours and how you want it to be, and altering it to fit your lifestyle. I once tried my hand at making a bag simply by looking at the original. It was an Amy Butler bag and I wanted to see how close I could get to the original by looking at an image of the original. In the end the measurements were as perfect as I could get them-from handle to pockets-and in the end I was quite happy with the results.

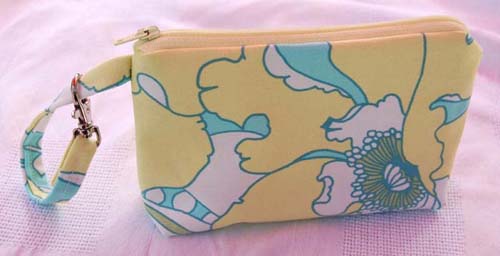
Here are a few images of the set made with an Amy Butler upholstery print that was simply gorgeous in that the vibrancy of the print cheered just about anyone, and I really liked the quality of the cotton fabric. I have more of this fabric in stock and you will probably see more items from this fabric in my Craftzies shop in the near future (the fabric has moved ever so close to the sewing pile…Im getting closer!).


Here are some images of how I altered a pattern slightly as the original pattern was simply for a baby tunic top and a diaper cover. With a few alterations I have a rather different item and when I make these baby kimono sets I simply measure out the 2 front pieces, back piece, 2 sleeves, and then the front, back and tabs and flaps for the diaper cover from the pattern I made for myself..based again off of the one you see here, and then for the details such as the ties and trim around the edge I don’t bother using the pattern pieces as I don’t need to, they are simply long strips of fabric stitched together, but I do have in my pattern notes (which I like to keep on a white index card in my ziplock bag that has my original pattern in it) how wide and long I need those strips and ties to be so I can ensure the proper length when making those pieces.


Here is a robe I made for a customer. I really liked how this robe turned out and the customer seemed very pleased as well. Here is the pattern I used, and then I altered it by adding a flair around the bottom, and lining the collar with a Japanese inspired cotton print, as well as sleeves that you could roll up and button if desires and still have the sleeve design visible and looking good.


Here is an image of the original pattern I used for this item.


So now that I have shown you an item that I made completely from scratch, and then two other items that I made by altering the original, printed patterns, I am going to lead you through how to make your own items from scratch. Either bring the item you want to remake, or an image of the item you want to make to the cutting table. Bring over paper, pencil, sharpie, ruler, notebook or paper in which to write notes (index cards work too), and scissors.

Materials Needed:
White paper to make pattern from
Scissors
Pencil, sharpie, pen (I know you’re excited about your project but get at least something to write with)
Fabric (we will cover how much fabric + notions needed below)
Notions (again, see below on the project you are making)
Interfacing (optional)
Stabilizer (optional)

*Though both interfacing and stabilizer are optional, if you are planning on making a tote similar to the one I have pictured above, I did use both of those materials and recommend them for the project. I picked up both the interfacing and stabilizer at joann fabrics, along with the zippers and additional hardware/ notions you see used to make this item.

You can either make a pattern of the item you want to make, and then use that pattern to make the item you want or you can cut the fabric and the pattern at the same time and then proceed to make the original item, cutting down and altering both the fabric version and the pattern as you go until the results are that you have the finished product you wanted, as well as a pattern. I don’t do this often, though sometimes I feel I need to see, feel and try out a fabric version to see how much I like the finished product, and will in most cases take that altered pattern I made myself and cut a new and cleaner version of the pattern I just made. Just remember at that point to ditch the old one so you don’t utterly confuse yourself later on when you go to use the pattern at a later date.

Ok, so here is where we get into the details. It might seem really hard I know, but it isn’t. The point here is to take the original item you want to make and look closely at all of the details associated with that item. What are all of the components associated with this item. For the Amy Butler weekend tote, it consisted of a front and back, bottom, 2 sides, 2 pockets outside, 2 inside, and a little change purse to go with it. I made myself a list of each piece I needed down to the last detail. Once I had this list of the pieces I needed I then added the measurements of those pieces. For each piece I added half an inch to the seam before I cut the fabric, and assume I will need 1.5-2” for any seam that will include a zipper. I find a fabric marker or chalk great for these kinds of projects as you can outline where you are going to cut the fabric and then make changes and such before cutting the fabric. For the shoulder straps, measure how long you want yours to be and add a little bit of length to the end of each strap to allow for the seams.

Once you have all of your outside pieces, make the lining, cutting both a lining of fabric, interfacing and stabilizer, sew all of the smaller details to the front, back, and inside lining, including stitching the shoulder straps to the outside of the bag. Sew the side pieces to the front, and then sew those side pieces to the back panel. Add the bottom panel for the outside, and then do the very same to the lining, only leave about 6” opening at the bottom front of the lining.

Place your front and back pieces so they are facing each other, and stitch the entire bag closed, making sure to tuck the handles in as you sew the bag from the inside. Turn your bag right side out through the bottom 6” hole left, and then pull the inside lining out and pinch and sew the seam closed. Add the button holes, buttons, metal hardware as needed as you go along and you are all set. Just remember if you are planning on making a pattern from your fabric item..which in this case is more of a workable prototype than anything, making any changes to the pattern that you did to the fabric version comes in so handy when you want to make more of this fabulous new item you have just designed for yourself.

So, there you have some details on how I copy patterns, how I alter patterns, though I am the first to admit a separate and certainly more detailed post on how to alter patterns should be a post of its own, but then also how I make a pattern from scratch. Any questions feel free to let me know and happy pattern making!

Lindsay ;)